Neuroblast - Creating the Game
This lesson will teach you how to create a space shooter game using pygame.
Game Description
For the final project of this course, we will be creating a space shooting game that will use a Neural Network AI system to allow it to learn its own AI behavior.
In the Snake game, we created AIs that were based around solving a specific problem. For this game, we're going to have the AI learn its own behavior.
Here's a description of how the game is played.
1. The player is a space ship, and they can move in all directions using the arrow keys
2. When the player presses space, they fire a bullet towards the top of the screen
3. Enemies spawn at the top of the screen and move down towards the player
4. When the player's bullets hit the enemies, those enemies are damaged. When the enemy's health is 0, they are destroyed.
5. The enemy fires bullets at the player that will damage their ship, and if the player receives enough damage, they will be destroyed.
Based on this description, we are going to be tackling a specific question: When should the enemy fire a bullet?
In our game, we could set it up so that the enemy simply continuously fires. Obviously that would be the best approach if the enemy had no limitations. But what if there were these limitations?
1. Every time the enemy fires, they have to wait before they can fire again.
2. The enemy has a limited number of shots to fire at the player.
In case 1, the enemy would only want to fire when they know they have a good shot, otherwise they might miss a good shot opportunity.
In case 2, the enemy would need to conserve their shots until they know they are likely to hit the player.
Here is going to be our strategy for building the game.
1. Create the main game loop and main menu
2. Adding the gameplay screen and letting our player move around
3. Adding enemies to the play screen
4. Adding bullets and destroying ships
5. (Next Lesson) Adding more advanced AI methods
With that out of the way, let's get started creating Neuroblast!
Creating Project Assets
For this project, there are a few requirements.
1. Make sure that you're using python version 3.6
2. Pip install keras version 2.1.5 (The tensorflow sometimes has issues on later keras version, use the command "pip install keras==2.1.5)
To create the initial project, create a new folder called Neuroblast-Game that will hold all your files.
Inside of that folder, create the following two folders, these will hold our non-code assets that the game will use:
1. Create a folder called art
2. Create a folder called font
Now, download the following assets and put them in the art folder
1. neuro-blast_logo.png
2. python-game_background.png
3. python-sprites.png
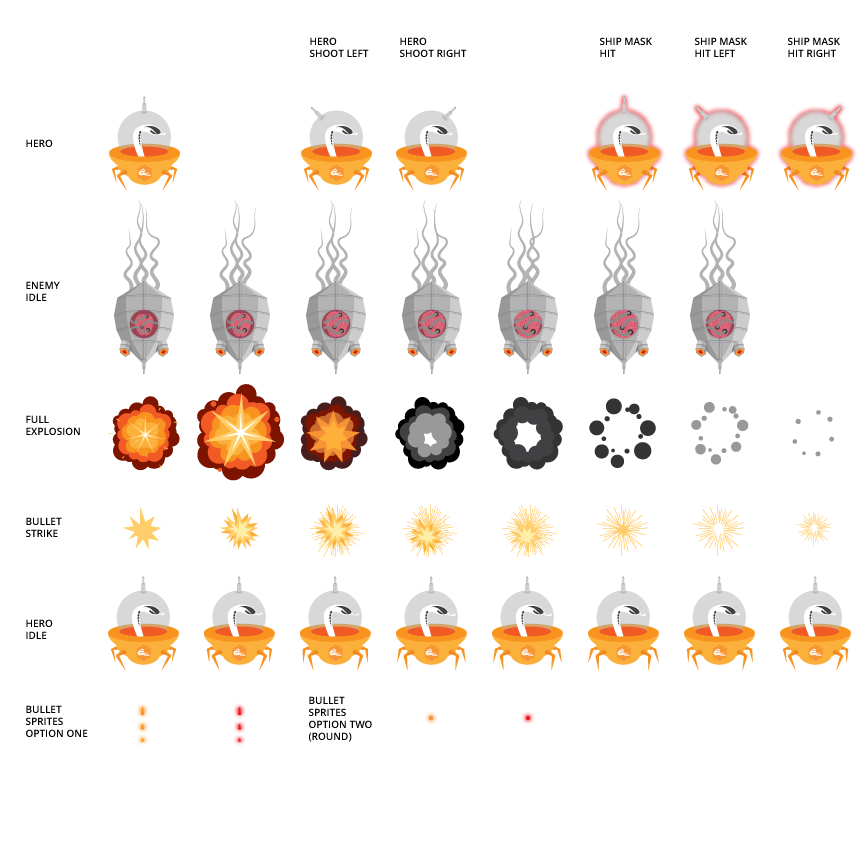
Next, download the below asset and place it in the font folder
De Valencia (beta).otf
The files in your folder should now look like this.
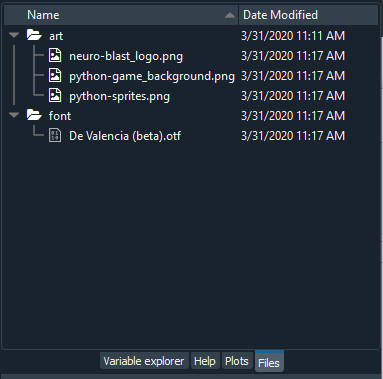
With those assets added, we can now get to creating our game.
Creating the Game Loop
The game loop that we will use will look similar to the Snake game, with a few minor differences.
1. We're going to set up the initial window with half of it blank, we'll use that space later for AI visualizations
2. We're going to display a scaled background in our window using a sprite asset in the art folder.
3. We're going to set up a constants file like we did with the Snake game to manage values that shouldn't change over the course of the game.
To begin, create a file inside of your Neuroblast-Game folder called constants.py. This will be helpful to track all of the constants we're going to use.
We will store the width and height of our window, as well as specify that our game is only going to occupy half of the width.
window_width = 1280
window_height = 720
game_width = int(window_width/2)

frames_per_second = 30
Next, create a file called game.py, this is where we're going to create our core game loop.
In this file, we're going to:
1. Create a class called Game that will handle the main loop
2. Set up the window with the proper resolution
3. Update the display with the correct frames per second
4. Allow the player to quit
import pygame
import constants

class Game:
    def __init__(self):

        pygame.init()

        #Create the window
        resolution = (constants.window_width, constants.window_height)
        screen = pygame.display.set_mode(resolution)
        pygame.display.set_caption("NeuroBlast")

        #Set up the clock to manage the frames per second
        clock = pygame.time.Clock()
        exit_game = False

        #Game Loop, lets the player click the exit button to quit
        while not exit_game:
            event_queue = pygame.event.get()
            for event in event_queue:
                if event.type == pygame.QUIT:
                    exit_game = True

            pygame.display.flip()
            clock.tick(constants.frames_per_second)

        pygame.quit()

Game()
With this code, you should be able to play the game, but all it does is show a black window. Next, we'll add the main menu to our game.
Creating the Menu
To have our system be easy to update as we add more different types of screens, we're going to create a state system for our game. Ultimately, we're going to have multiple states, such as
1. A Main Menu State
2. A Game Play State
3. A Game Over State
For now, we're going to focus on setting up the main menu. We're going to start in the Game class, to add a background that is going to display regardless of the different states the game is in.
        clock = pygame.time.Clock()
        exit_game = False

        background = pygame.image.load('art/python-game_background.png')
        bgsize = background.get_size()
        #Because the sprite is larger than our window size, we need to resize the background so it will fit
        w, h = bgsize
        aspect = w/h
        wscale = constants.game_width
        hscale = wscale/aspect
        bgscaled = pygame.transform.scale(background, (constants.game_width, int(hscale)))

        #Game Loop, lets the player click the exit button to quit
        while not exit_game:
            event_queue = pygame.event.get()
            for event in event_queue:
                if event.type == pygame.QUIT:
                    exit_game = True

            #Create the background on our screen using the blit function
            #It takes in the rescaled sprite, a position to display the sprite, and the rect parameters for the resized sprite
            screen.blit(bgscaled,(0,0),(0,0,constants.game_width,constants.window_height))

            pygame.display.flip()
            clock.tick(constants.frames_per_second)

        pygame.quit()
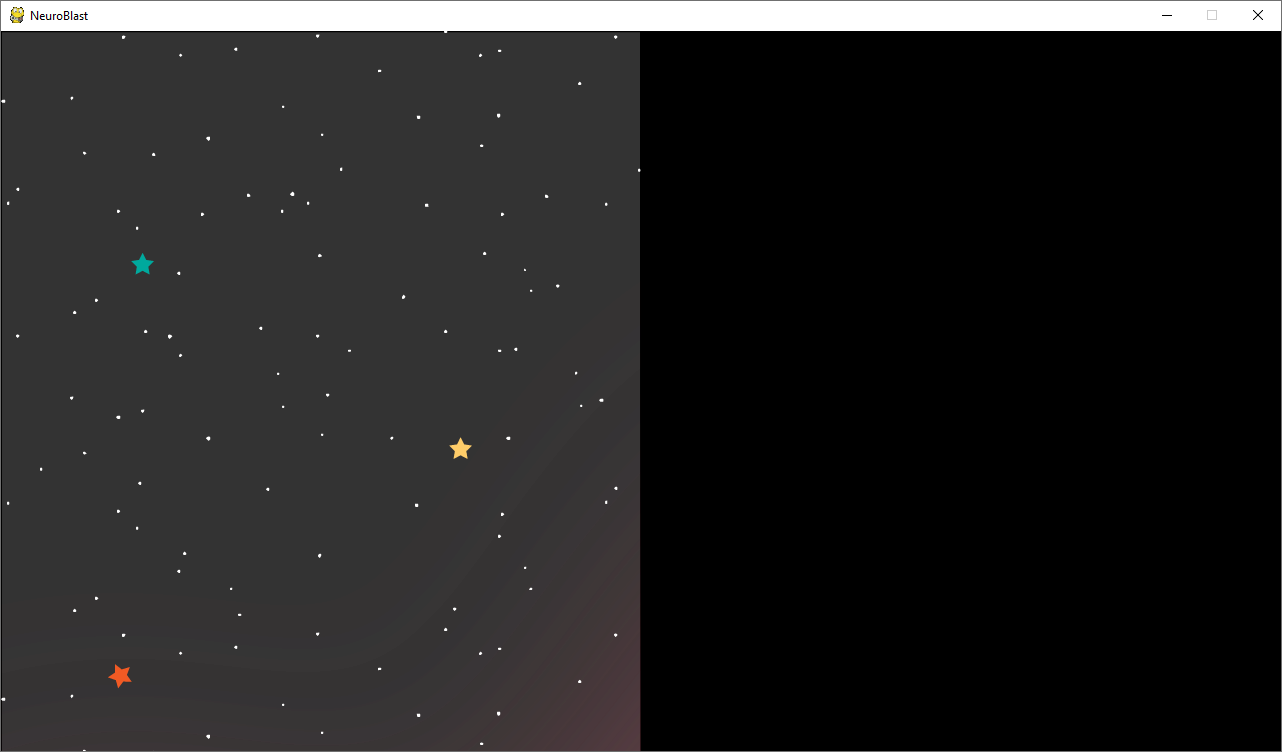
When you play the game, you'll see the star background at the left side of the screen. This is where the player is going to be playing.
Now it's time to add the state system. Create a new file called gamestates.py.
We're going to create a parent class called GameState, since there are going to be multiple states. We're going to have our Menu class inherit that class.
Inside the Menu class, we're going to load up art assets to display, and put them on the screen.
import pygame

class GameState():
    def update(self, screen, event_queue, delta_time, clock):
        return self

class Menu(GameState):
    def __init__(self):
        self.logo = pygame.image.load("art/neuro-blast_logo.png")

    def update(self, screen, event_queue, delta_time, clock):
		#The second argument formula ensures the image is put at the top center of the left side game screen.
        screen.blit(self.logo,(screen.get_width() / 4 - 265,screen.get_height() * 3 / 4-500))

        return self
Before we can see our results, we need to have our game loop call the menu, and have it update every frame. For that, go to the game.py file. We're going to:
1. Import the gamestates file
2. Have the initial game state be the menu
3. Update the menu state on every frame.
import pygame
import constants
import gamestates

class Game:
Now, to update the initial menu to have it use the state system.
        hscale = wscale/aspect
        bgscaled = pygame.transform.scale(background, (constants.game_width, int(hscale)))

        state = gamestates.Menu()

        #Game Loop, lets the player click the exit button to quit
        while not exit_game:
            event_queue = pygame.event.get()
            for event in event_queue:
                if event.type == pygame.QUIT:
                    exit_game = True

            #Create the background on our screen using the blit function
            #It takes in the rescaled sprite, a position to display the sprite, and the rect parameters for the resized sprite
            screen.blit(bgscaled,(0,0),(0,0,constants.game_width,constants.window_height))

            state = state.update(screen, event_queue, clock.get_time()/1000.0, clock)

            pygame.display.flip()
            clock.tick(constants.frames_per_second)

        pygame.quit()
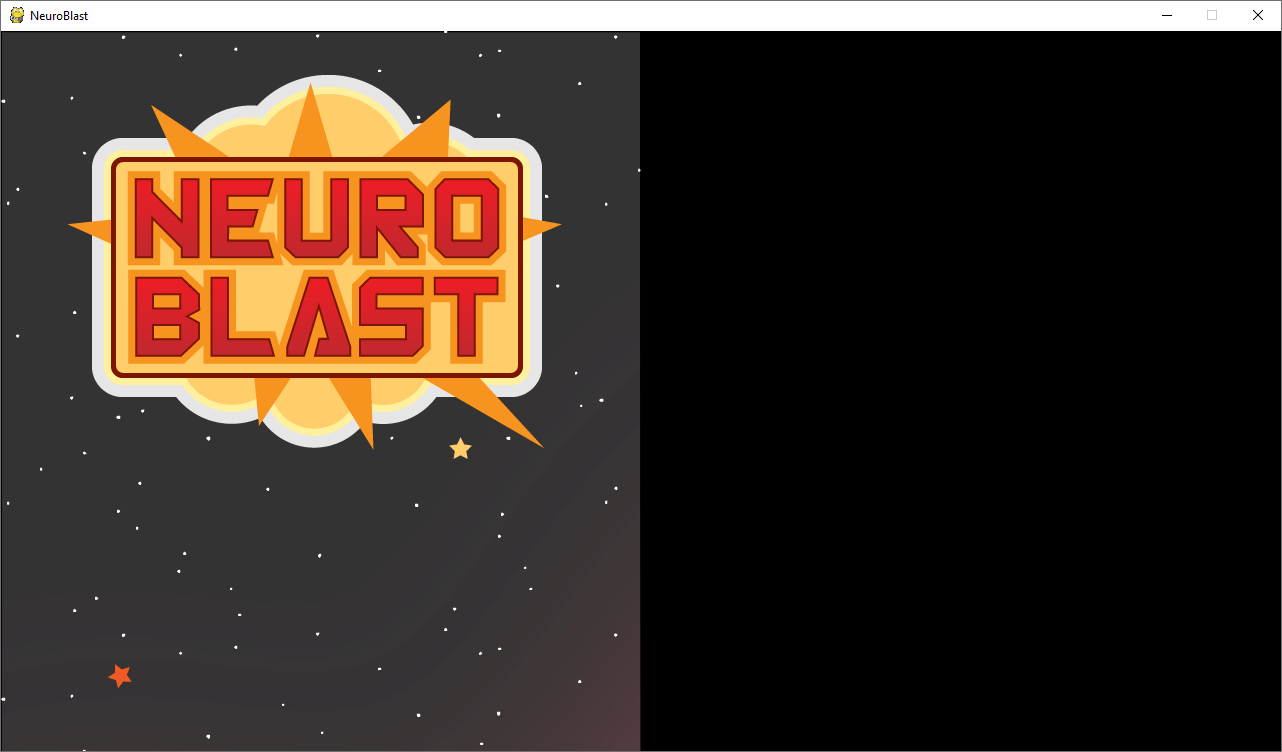
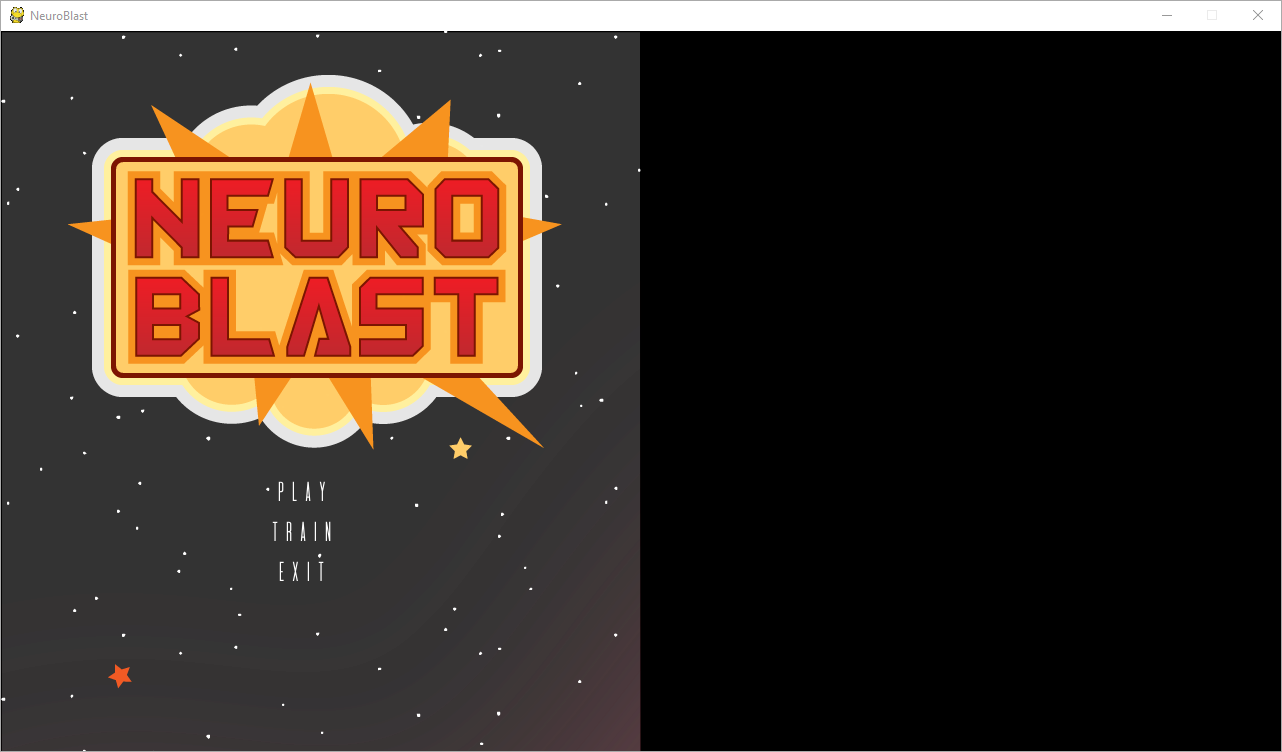
With these additions, you can click play and see the logo on the main screen.
Next, we're going to add text to the screen to let players select options from the main screen.
Our screen will have three options for the player
1. Play - to play the game with the AI that was setup
2. Train - to play the game while training the AI in how to make decisions
3. Exit - to quit the game
To let the player select options, they will press the arrow keys up and down, and press the Enter/Return key when they want to make their selection
To make our lives easier for displaying text, we're going to create a utility file with some helpers to handle text more efficiently. Create a file called game_utils.py.
This utility file will have two functions
1. A function to load a cool-looking font that can be used anywhere in our code
2. A function to display text at a specific location with a color.
import pygame
import pygame.freetype

# Utility functions
def load_font(size):
    global font
    font = pygame.freetype.Font('font/De Valencia (beta).otf', size)

def display_text(text, x, y, color, surface):
    global font
    text_color = pygame.Color(*color)
    text = font.render(text, text_color)
    text_position = text[0].get_rect(centerx=x, centery=y)
    surface.blit(text[0], text_position)
Having these functions will make it easier for the game states we create that involve text to have fewer lines of code and make them easier to read.
With these utilities set up, let's set up some standard colors inside of the constants.py file, that way we don't have to redefine simple colors in multiple places.
window_width = 1280
window_height = 720
game_width = int(window_width/2)

frames_per_second = 30

BLACK = (0, 0, 0)
WHITE = (255, 255, 255)
GREEN = (0, 255, 0)
BLUE = (0, 0, 255)
RED = (255, 0, 0)
With these set up, it's time to add the text to our menu screen. Import the necessary requirements, and we'll use display_text to show our three menu options.
import pygame
from game_utils import display_text
from game_utils import load_font
import constants

class GameState():
    def update(self, screen, event_queue, delta_time, clock):
        return self

class Menu(GameState):
    def __init__(self):
        self.logo = pygame.image.load("art/neuro-blast_logo.png")
        load_font(24)

    def update(self, screen, event_queue, delta_time, clock):
        screen.blit(self.logo,(screen.get_width() / 4 - 265,screen.get_height() * 3 / 4-500))

        display_text('Play', screen.get_width() / 4 - 20, screen.get_height() * 3 / 4
                    - 80, constants.WHITE, screen)
        display_text('Train', screen.get_width() / 4 - 20, screen.get_height() * 3 / 4
                    - 40, constants.WHITE, screen)
        display_text('Exit', screen.get_width() / 4 - 20, screen.get_height() * 3 / 4,
                    constants.WHITE, screen)

        return self
When you play the screen, you will now see the three different text options. There's two things we need now: A cursor, and the ability to select our options.
We're going to add a variable to determine where the cursor will be, menu_selection, and display the cursor on the screen. The u'\u00bb' is the code to display a cursor-like image.
class Menu(GameState):
    def __init__(self):
        self.logo = pygame.image.load("art/neuro-blast_logo.png")
        load_font(24)
        self.menu_selection = 2

    def update(self, screen, event_queue, delta_time, clock):
        screen.blit(self.logo,(screen.get_width() / 4 - 265,screen.get_height() * 3 / 4-500))

        display_text('Play', screen.get_width() / 4 - 20, screen.get_height() * 3 / 4
                    - 80, constants.WHITE, screen)
        display_text('Train', screen.get_width() / 4 - 20, screen.get_height() * 3 / 4
                    - 40, constants.WHITE, screen)
        display_text('Exit', screen.get_width() / 4 - 20, screen.get_height() * 3 / 4,
                    constants.WHITE, screen)
        display_text(u'\u00bb', screen.get_width() / 4 - 60, screen.get_height() * 3 / 4
                    - 40*self.menu_selection, constants.WHITE, screen)

        return self
Now that the cursor is on the screen, we need to set up the logic for the cursor. The logic will be as follows:
1. When the player presses up, the cursor will move up 1 option.
2. When the player presses down, the cursor will move down 1 option.
3. If moving up or down will leave the list of options, wrap around to go to the bottom or top option
4. When the player preses Enter/Return, the currently selected option will activate.
        display_text(u'\u00bb', screen.get_width() / 4 - 60, screen.get_height() * 3 / 4
                    - 40*self.menu_selection, constants.WHITE, screen)

        next_state = self
        # Logic for handling key presses
        for event in event_queue:
            if event.type == pygame.KEYDOWN:
                if event.key == pygame.K_DOWN:
                    self.menu_selection -= 1
                    #wrap from bottom to top
                    if self.menu_selection == -1:
                        self.menu_selection = 2
                if event.key == pygame.K_UP:
                    self.menu_selection += 1
                    #wrap from top to bottom
                    if self.menu_selection == 3:
                        self.menu_selection = 0
                if event.key == pygame.K_RETURN:
                    if self.menu_selection == 2:
                        print("Switch to Game Play mode")
                    elif self.menu_selection == 1:
                        print("Switch to Game Training Mode")
                    else:
                        #Exit the game
                        next_state = None
        return next_state
Lastly, we're going to have our game loop exit whenever the returned game state is None inside of the Game class.
			screen.blit(bgscaled,(0,0),(0,0,constants.game_width,constants.window_height))

            state = state.update(screen, event_queue, clock.get_time()/1000.0, clock)
            if state == None:
                exit_game = True
            pygame.display.flip()
Now, when you play the game, you should be able to move up and down and select the options. Right now, the play and train options only show a line of text to the console. You will be able to exit by selecting the exit option.
Adding the Player
To let players play our game, we're going to need to add the player's ship and have them move around. To do that, we're finally making our second state: the Play state.
We're going to start small with our state, but add more onto it as we add more functionality
1. We're going to have the play state activate when the player selects the "Play" option from the menu
2. When the player presses the "Escape" key, we're going to exit back to the menu.
                if event.key == pygame.K_UP:
                    self.menu_selection += 1
                    #wrap from top to bottom
                    if self.menu_selection == 3:
                        self.menu_selection = 0
                if event.key == pygame.K_RETURN:
                    if self.menu_selection == 2:
                        next_state = Play()
                    elif self.menu_selection == 1:
                        print("Switch to Game Training Mode")
                    else:
                        #Exit the game
                        next_state = None
        return next_state

class Play(GameState):

    def update(self, screen, event_queue, delta_time, clock):
        for event in event_queue:
            if event.type == pygame.KEYDOWN:
                if event.key == pygame.K_ESCAPE:
                    return Menu()
        return self
With this functionality, you can select the play option and exit back to the menu.
Pretty boring game, right? It's time to add some interactivity. We're going to let the player move a ship around the screen by
1. Creating the ability to display ships on the screen
2. Letting the player move the ship around the screen with the arrow keys
To start, we're going to create a new file, called actors.py. This file will have multiple classes related to managing objects on the screen.
import pygame

# The SpriteSequence class will display a sprite based on a particular position on the sprite sheet
class SpriteSequence():
    def __init__(self,sheet,rect):
        self.sheet = sheet
        self.rect = rect

    def update(self, surface, pos):
        surface.blit(self.sheet,pos,(self.rect.x,
                                        self.rect.y,
                                        self.rect.w,self.rect.h))


class Ship(pygame.sprite.Sprite):
    def __init__(self):
        super(Ship, self).__init__()
        self.spritesheet = pygame.image.load("art/python-sprites.png")
        self.sprite_sequence = None


class Player(Ship):
    def __init__(self):
        super(Player, self).__init__()
        #Start Position
        self.x = 320
        self.y = 500
        #When you start, you're not moving
        self.velx = 0
        self.vely = 0
        #Ensuring that the image will be 96x96 pixels
        self.image = pygame.Surface((96,96))
        self.rect = self.image.get_rect()
        ## Generate the sprite image from spritesheet
        ssrect = pygame.Rect((96,96,96,96))
        self.image.blit(self.spritesheet,(0,0),ssrect)
        self.image.convert()
        self.image.set_colorkey(self.image.get_at((0, 0)))
        #Pick the specific image from the sprite sheet to use
        self.idle_sequence = SpriteSequence(self.spritesheet,pygame.Rect(96,576,96,192))

    def update(self, screen, event_queue, delta_time):

        self.rect.center = (self.x, self.y)
        self.image.fill((0,0,0))
        self.idle_sequence.update(self.image,(0,0))
Next, we're going to update the Play state to create a player object on the start of that state, and display it on the screen.
import pygame
from game_utils import display_text
from game_utils import load_font
import constants
from actors import Player
class Play(GameState):

    def __init__(self):
        self.player = Player()
        self.userGroup = pygame.sprite.Group()
        self.userGroup.add(self.player)

    def update(self, screen, event_queue, delta_time, clock):

        self.player.update(screen, event_queue, delta_time)
        self.userGroup.draw(screen)

        for event in event_queue:
            if event.type == pygame.KEYDOWN:
                if event.key == pygame.K_ESCAPE:
                    return Menu()
        return self
When you play the game, the player's ship will be drawn on the screen, but you can't move them around yet.
To have the character move, we're going to do the following:
1. Add a constant to the constants.py file to set how fast the ship can move
2. Add user input to update the position of the ship in Player class
First, the constants.py file.
window_width = 1280
window_height = 720
game_width = int(window_width/2)

frames_per_second = 30

BLACK = (0, 0, 0)
WHITE = (255, 255, 255)
GREEN = (0, 255, 0)
BLUE = (0, 0, 255)
RED = (255, 0, 0)

ship_acceleration = 100
Next, the Player class. We'll import constants, and then use that inside of the update() method of the Player class.
import pygame
import constants

class SpriteSequence():
def update(self, screen, event_queue, delta_time):

        self.rect.center = (self.x, self.y)
        self.image.fill((0,0,0))
        self.idle_sequence.update(self.image,(0,0))

        keys=pygame.key.get_pressed()

        if keys[pygame.K_LEFT]:
            self.velx = -constants.ship_acceleration
        if keys[pygame.K_RIGHT]:
            self.velx = constants.ship_acceleration
        if keys[pygame.K_UP]:
            self.vely = -constants.ship_acceleration
        if keys[pygame.K_DOWN]:
            self.vely = constants.ship_acceleration

        #When the player is not pressing a key, change the velocity to 0
        if not (keys[pygame.K_UP] or keys[pygame.K_DOWN]):
            self.vely = 0
        if not (keys[pygame.K_LEFT] or keys[pygame.K_RIGHT]):
            self.velx = 0

        #Ensures that the player cannot move outside the boundaries of the screen
        if self.x+(self.velx*delta_time)>640-48 or self.x+(self.velx*delta_time)<48:
            self.velx = 0
        if self.y+(self.vely*delta_time)>720-48 or self.y+(self.vely*delta_time)<48:
            self.vely = 0

        #This code ensures that the movement speed is not affected by the framerate
        self.x += self.velx * delta_time
        self.y += self.vely * delta_time
When you play the game now, you'll be able to move around on the screen using the arrow keys.
Adding an Enemy
The enemy is going to act a little like our player's ship, but it will move without player input and use a different sprite.
To add the enemy, we're going to:
1. Add additional constants to constants.py related to enemy movement.
2. Add a new Enemy class to the actors.py file.
3. Update the Play state to draw the enemies on screen.
To start, update the constants.py file to include information about the enemy movement speed
BLACK = (0, 0, 0)
WHITE = (255, 255, 255)
GREEN = (0, 255, 0)
BLUE = (0, 0, 255)
RED = (255, 0, 0)

ship_acceleration = 100
enemy_move_speed = 16
Next, we're going to update the actors.py file to:
1. Import the rand and math modules
2. Include the new Enemy code
First, at the top of the actors.py file, import the necessary modules.
import pygame
import constants
from random import randrange
import math

class SpriteSequence():
Then, add the Enemy class. It does some of the same things as the Player class.
        #This code ensures that the movement speed is not affected by the framerate
        self.x += self.velx * delta_time
        self.y += self.vely * delta_time

class Enemy(Ship):
    def __init__(self):
        super(Enemy, self).__init__()
        # Enemy specific stuff here
        self.x = randrange(0,450)
        self.y = -50
        self.velx = 0
        self.vely = constants.enemy_move_speed       # wish there was a vector class
        self.image = pygame.Surface((96,192))
        self.rect = self.image.get_rect()
        ## Generate the sprite image from spritesheet
        ssrect = pygame.Rect((96,192,96,192))
        self.image.blit(self.spritesheet,(0,0),ssrect)
        self.image.convert()
        self.image.set_colorkey(self.image.get_at((0, 0)))
        self.rect.center = (self.x, self.y)
        self.spawntime = pygame.time.get_ticks()
        self.idle_sequence = SpriteSequence(self.spritesheet,pygame.Rect(96,192,96,192))

    def update(self, screen, event_queue, delta_time):
        if not self.alive():
            return


        self.velx = math.sin((pygame.time.get_ticks()-self.spawntime)/1800) * 40
        self.x += self.velx * delta_time
        self.y += self.vely * delta_time

        self.rect.center = (self.x, self.y)

        self.image.fill((0,0,0))
        self.idle_sequence.update(self.image,(0,0))
Lastly, update the gamestate.py file to update the enemy on every frame
import pygame
from game_utils import display_text
from game_utils import load_font
import constants
from actors import Player
from actors import Enemy
class Play(GameState):

    def __init__(self):
        self.player = Player()
        self.userGroup = pygame.sprite.Group()
        self.userGroup.add(self.player)
        self.enemies = pygame.sprite.Group()
        self.enemy = Enemy()
        self.enemies.add(self.enemy)

    def update(self, screen, event_queue, delta_time, clock):

        self.player.update(screen, event_queue, delta_time)
        self.userGroup.draw(screen)

        self.enemies.update(screen, event_queue, delta_time)
        self.enemies.draw(screen)

        for event in event_queue:
            if event.type == pygame.KEYDOWN:
                if event.key == pygame.K_ESCAPE:
                    return Menu()
        return self
When you play the game, the enemy now moves down the screen.
Spawning More Enemies
Right now, we have one enemy spawn at the beginning of the game. But we'd like enemies to be continually spawning for the player to be able to defeat.
This will be a simple feature to add. We only need to make 2 updates:
1. We will updates the constants.py file to determine how often the enemies will spawn.
2. We will add spawning with a cooldown timer to the Play class.
First, the constants.py file.
window_width = 1280
window_height = 720
game_width = int(window_width/2)

frames_per_second = 30

BLACK = (0, 0, 0)
WHITE = (255, 255, 255)
GREEN = (0, 255, 0)
BLUE = (0, 0, 255)
RED = (255, 0, 0)

ship_acceleration = 100
enemy_move_speed = 16
enemy_spawn_rate = 8
Next, the Play class, in the update() method.
class Play(GameState):

    def __init__(self):
        self.player = Player()
        self.userGroup = pygame.sprite.Group()
        self.userGroup.add(self.player)
        self.enemies = pygame.sprite.Group()
        self.enemy = Enemy()
        self.enemies.add(self.enemy)
        self.spawntimer = 0
        self.spawnbreak = constants.enemy_spawn_rate

    def update(self, screen, event_queue, delta_time, clock):

        self.player.update(screen, event_queue, delta_time)
        self.userGroup.draw(screen)

        self.enemies.update(screen, event_queue, delta_time)
        self.enemies.draw(screen)

        self.spawntimer += delta_time
        if self.spawntimer > self.spawnbreak:
            self.enemies.add(Enemy())
            self.spawntimer = 0

        for event in event_queue:
            if event.type == pygame.KEYDOWN:
                if event.key == pygame.K_ESCAPE:
                    return Menu()
        return self
When you play the game, enemies will spawn every 8 seconds. You can change the constant to have enemies spawn faster or slower, depending on how you want the game to play.
Note: As you create more enemies on the screen, the game may start to experience frame rate issues.
Firing Bullets
So we can move around, and enemies spawn on the screen and move towards the player, but currently there isn't much to interact with. Now we're going to add the ability to fire bullets
We'll set up the bullet firing mechanism in the following order:
1. Set up constants related to bullet speed, bullet direction, and how fast you can fire
2. Set up the Bullet class inside the actors.py file to control the bullet objects
3. Set up enemies to fire continuously and update the screen for those bullets
4. Set up the player to fire when they press the space bar and update the screen for those bullets
To start, add these lines to the constants.py file.
ship_acceleration = 100
enemy_move_speed = 16
enemy_spawn_rate = 8

#How fast the bullets will move
player_bullet_speed = 320
enemy_bullet_speed = 160
#Enemy bullets will move down in the y axis
enemy_bullet_direction = (0, 1)
#Player bullets will move up in the y axis
player_bullet_direction = (0, -1)
#Will need to wait this long in seconds before firing again
enemy_shot_cooldown = 0.5
player_shot_cooldown = 0.3
Next, go to the actors.py file. To create the bullet class, we're going to:
1. Set the image of the bullet to the correct image on the spritesheet
2. Have the bullet act differently if it is fired by a player or an enemy
3. Set up the bullet's update method to have it move on every frame
4. Remove the bullet if it leaves the screen
class Ship(pygame.sprite.Sprite):
    def __init__(self):
        super(Ship, self).__init__()
        self.spritesheet = pygame.image.load("art/python-sprites.png")
        self.sprite_sequence = None

class Bullet(pygame.sprite.Sprite):
    def __init__(self, x, y, color, container):
        pygame.sprite.Sprite.__init__(self, container)
        self.spritesheet = pygame.image.load("art/python-sprites.png")
        self.image = pygame.Surface((16,16), flags=pygame.SRCALPHA)
        self.rect = self.image.get_rect()
        basex = 423
        # Enemy bullets will be red, player bullets will be green
        if color==constants.RED:
            basex += 96
            self.speed = constants.enemy_bullet_speed
            self.direction = constants.enemy_bullet_direction
        else:
            self.speed = constants.player_bullet_speed
            self.direction = constants.player_bullet_direction
        # Generate the sprite image from spritesheet
        ssrect = pygame.Rect((basex,710,16,16))
        self.image.blit(self.spritesheet,(0,0),ssrect)
        self.rect = self.image.get_rect()
        self.rect.center = (x, y)

    def update(self, delta_time):
        (x, y) = self.rect.center
        y += self.direction[1] * self.speed * delta_time
        x += self.direction[0] * self.speed * delta_time
        self.rect.center = (x, y)
        # If the bullet leaves the frame, destroy it so we don't have to track it anymore
        if y <= 0 or y >= constants.window_height or x <= 0 or x >= constants.game_width:
            self.kill()
Next, we'll set up the enemies to fire bullets inside of the Enemy class. To do this:
1. We'll set up a cooldown timer so that enemies don't fire continually
2. We'll have the enemy fire if the cooldown timer is finished
3. We'll have all the enemy's bullets set up in a group so we can track them easily
class Enemy(Ship):
    def __init__(self, bullet_group):
        super(Enemy, self).__init__()
        self.x = randrange(0,450)
        self.y = -50
        self.velx = 0
        self.vely = constants.enemy_move_speed
        self.image = pygame.Surface((96,192))
        self.rect = self.image.get_rect()
        ## Generate the sprite image from spritesheet
        ssrect = pygame.Rect((96,192,96,192))
        self.image.blit(self.spritesheet,(0,0),ssrect)
        self.image.convert()
        self.image.set_colorkey(self.image.get_at((0, 0)))
        self.rect.center = (self.x, self.y)
        self.spawntime = pygame.time.get_ticks()
        self.idle_sequence = SpriteSequence(self.spritesheet,pygame.Rect(96,192,96,192))

        self.bullets = bullet_group
        self.shot_cooldown = constants.enemy_shot_cooldown
        self.cooldown_timer = 0
        self.can_fire = True


    def update(self, screen, event_queue, delta_time):
        if not self.alive():
            return


        self.velx = math.sin((pygame.time.get_ticks()-self.spawntime)/1800) * 40
        self.x += self.velx * delta_time
        self.y += self.vely * delta_time

        self.rect.center = (self.x, self.y)

        self.image.fill((0,0,0))
        self.idle_sequence.update(self.image,(0,0))

        if not(self.can_fire):
            self.cooldown_timer += delta_time
            if self.cooldown_timer>self.shot_cooldown:
                self.can_fire = True
                self.cooldown_timer = 0

        if self.can_fire:
            Bullet(self.x,self.y+96,constants.RED,self.bullets)
            self.can_fire = False
Lastly, we're going to update our Play state to account for our enemy's bullets, as well as ensure that all enemies that are created can put bullets in the enemy bullets group.
class Play(GameState):

    def __init__(self):
        self.player = Player()
        self.userGroup = pygame.sprite.Group()
        self.userGroup.add(self.player)
        self.enemies = pygame.sprite.Group()
        # Add the new enemy bullets group and update the enemy to use that group when it spawns
        self.enemyBullets = pygame.sprite.Group()
        self.enemy = Enemy(self.enemyBullets)
        #
        self.enemies.add(self.enemy)

        self.spawntimer = 0
        self.spawnbreak = constants.enemy_spawn_rate

    def update(self, screen, event_queue, delta_time, clock):

        self.player.update(screen, event_queue, delta_time)
        self.userGroup.draw(screen)

        self.enemies.update(screen, event_queue, delta_time)
        self.enemies.draw(screen)

        # Update enemy bullets and draw them on screen
        self.enemyBullets.update(delta_time)
        self.enemyBullets.draw(screen)
        #

        self.spawntimer += delta_time
        if self.spawntimer > self.spawnbreak:
            # Make sure enemies that spawn use the group as well
            self.enemies.add(Enemy(self.enemyBullets))
            #
            self.spawntimer = 0

        for event in event_queue:
            if event.type == pygame.KEYDOWN:
                if event.key == pygame.K_ESCAPE:
                    return Menu()
        return self
When you play the game, the enemies should now fire down at the player. Currently, the bullets don't do any damage.
Next, we'll add the ability for the player to fire bullets.
Go to the Player class, we'll update these parts of the code:
1. Set up the player's bullet group and timer
2. Set up the cooldown timer
3. Add the ability to press spacebar to fire a bullet
4. Set up the Play state to update the player's bullets
class Player(Ship):
    # Add the bullet group setup
    def __init__(self, bullet_group):
    #
        super(Player, self).__init__()
        #Start Position
        self.x = 320
        self.y = 500
        #When you start, you're not moving
        self.velx = 0
        self.vely = 0
        #Ensuring that the image will be 96x96 pixels
        self.image = pygame.Surface((96,96))
        self.rect = self.image.get_rect()
        ## Generate the sprite image from spritesheet
        ssrect = pygame.Rect((96,96,96,96))
        self.image.blit(self.spritesheet,(0,0),ssrect)
        self.image.convert()
        self.image.set_colorkey(self.image.get_at((0, 0)))
        #Pick the specific image from the sprite sheet to use
        self.idle_sequence = SpriteSequence(self.spritesheet,pygame.Rect(96,576,96,192))

        # Add the setup for firing the bullets
        self.can_fire = True
        self.bullets = bullet_group
        self.shot_cooldown = constants.player_shot_cooldown
        self.cooldown_timer = 0
		#
In the update method, we'll add the cooldown logic.
    def update(self, screen, event_queue, delta_time):

        self.rect.center = (self.x, self.y)
        self.image.fill((0,0,0))
        self.idle_sequence.update(self.image,(0,0))

        # Add firing cooldown logic
        if not(self.can_fire):
            self.cooldown_timer += delta_time
            if self.cooldown_timer>self.shot_cooldown:
                self.can_fire = True
                self.cooldown_timer = 0
        #
We'll add another keycode check to the player if they are pressing spacebar.
		keys=pygame.key.get_pressed()

        if keys[pygame.K_LEFT]:
            self.velx = -constants.ship_acceleration
        if keys[pygame.K_RIGHT]:
            self.velx = constants.ship_acceleration
        if keys[pygame.K_UP]:
            self.vely = -constants.ship_acceleration
        if keys[pygame.K_DOWN]:
            self.vely = constants.ship_acceleration
        # Add if statement to fire a bullet if the player presses the space bar
        if keys[pygame.K_SPACE] and self.can_fire:
            Bullet(self.x, self.y-42, constants.BLUE, self.bullets)
            self.can_fire = False
        #
'
In the Play class, we'll ensure that the user bullets are set up the same way as the enemy bullets.
class Play(GameState):

    def __init__(self):
        # Set up the bullet group
        self.userBullets = pygame.sprite.Group()
        self.player = Player(self.userBullets)
        #
        self.userGroup = pygame.sprite.Group()
        self.userGroup.add(self.player)
        self.enemies = pygame.sprite.Group()
        self.enemyBullets = pygame.sprite.Group()
        self.enemy = Enemy(self.enemyBullets)
        self.enemies.add(self.enemy)
Lastly, we'll make sure to update the bullets so they move across the screen and are drawn on the screen.
    def update(self, screen, event_queue, delta_time, clock):

        self.player.update(screen, event_queue, delta_time)
        self.userGroup.draw(screen)

        self.enemies.update(screen, event_queue, delta_time)
        self.enemies.draw(screen)

        self.enemyBullets.update(delta_time)
        self.enemyBullets.draw(screen)

        # Update the bullets on the screen
        self.userBullets.update(delta_time)
        self.userBullets.draw(screen)
        #
Great! We can fire bullets, but they don't actually do anything.
Next, we'll add collisions so the player can damage the enemies.
Destroying Enemies
The player and the enemy can both fire bullets, but right now the bullets just pass right through the ships. We'll set up collision detection so that when a bullet collides with a ship, it will damage it.
We'll start with destroying the enemies, and giving the player score for every time they hit an enemy. To set up destroying a ship, we'll do the following:
1. Add constants in constants.py related to health and score.
2. Update the Ship class to have health and be able to be destroyed.
3. Set up collision detection in the Play class to damage enemies when they are hit and give the player score.
We'll make the first updates inside the constants.py file, to add constants for starting health and score.
enemy_shot_cooldown = 0.5
player_shot_cooldown = 0.3

# New Constants
score_for_damage = 50
starting_health = 100
player_bullet_damage = 10
# Here, the enemy will do less damage than the player, but feel free to change it if you want a bigger challenge
enemy_bullet_damage = 5
#
Next, go to the Ship class. Since both the players and the enemies need the ability to take damage, we'll set up our method at this level.
class Ship(pygame.sprite.Sprite):
    def __init__(self):
        super(Ship, self).__init__()
        self.spritesheet = pygame.image.load("art/python-sprites.png")
        self.sprite_sequence = None
        # Add a new variable for the ship's health
        self.health = constants.starting_health
        #

    # Add the TakeDamage Method
    def TakeDamage(self, damage):
        # This is a failsafe in case two bullets hit a ship on the same frame
        # If one bullet would cause the ship to be destroyed, the next
        # bullet would try to destroy the ship too.
        if self.health<=0:
            return

        self.health -= damage
        if self.health <= 0:
            self.Die()

    def Die(self):
        self.kill()
	#
In the Play class, we'll add a variable to set the player's score at 0 when they start the game.
class Play(GameState):

    def __init__(self):
        self.userBullets = pygame.sprite.Group()
        self.player = Player(self.userBullets)
        self.userGroup = pygame.sprite.Group()
        self.userGroup.add(self.player)
        self.enemies = pygame.sprite.Group()
        self.enemyBullets = pygame.sprite.Group()
        self.enemy = Enemy(self.enemyBullets)
        self.enemies.add(self.enemy)

        self.spawntimer = 0
        self.spawnbreak = constants.enemy_spawn_rate

        # Add the score variable
        self.score = 0
        #
And in the update() method, we'll add the code to handle collisions.
	def update(self, screen, event_queue, delta_time, clock):

        self.player.update(screen, event_queue, delta_time)
        self.userGroup.draw(screen)

        self.enemies.update(screen, event_queue, delta_time)
        self.enemies.draw(screen)

        self.enemyBullets.update(delta_time)
        self.enemyBullets.draw(screen)

        self.userBullets.update(delta_time)
        self.userBullets.draw(screen)

        # Add collision
        enemies_hit = pygame.sprite.groupcollide(self.enemies,self.userBullets,False,True)
        for enemy, bullets in enemies_hit.items():
            enemy.TakeDamage(constants.player_bullet_damage)
            for b in bullets:
                self.score += constants.score_for_damage
        #

        self.spawntimer += delta_time
Now, when you play the game you will be able to destroy the enemies. Next, we'll add the ability for enemies to destroy the player.
Destroying the Player
To destroy the player, we'll set up code similar to the enemies. Because we set up code inside the Ship class, we only need to make a minor adjustment to the game state
Go to the Play class and add this small section of code.
        enemies_hit = pygame.sprite.groupcollide(self.enemies,self.userBullets,False,True)
        for enemy, bullets in enemies_hit.items():
            enemy.TakeDamage(constants.player_bullet_damage)
            for b in bullets:
                self.score += constants.score_for_damage

        # Logic for hitting the player
        player_hit = pygame.sprite.spritecollide(self.player,self.enemyBullets, True)
        for bullet in player_hit:
            self.player.TakeDamage(constants.enemy_bullet_damage)
        #
If you play the game now, after 20 hits (right now each enemy bullet does 5 damage) your ship will be destroyed.
Health and Score Display
It would be good for the player to know how much health they have left, as well as how much score they have accumulated.
We'll add those two displays to our screen using the display_text() function.
Go to the Play state and add these lines to the update() method.
        for event in event_queue:
            if event.type == pygame.KEYDOWN:
                if event.key == pygame.K_ESCAPE:
                    return Menu()

        # Will display the score and health variables at the top of the screen
        display_text("Score: "+str(self.score), 200, 20, constants.WHITE, screen)
        display_text("Health: "+str(self.player.health), 350, 20, constants.WHITE, screen)
        #

        return self
When you play the game now, the health and score will appear at the top of the screen.
Future Features
We now have a playable game! This is a good start, but here's what we're going to be doing in the next few lessons.
In the next lesson, we'll refactor the way that the enemy AI works so that it can be trained in the training mode.
Then, we'll add the neural network based AI to train the ships.
Lastly, we'll do some visual improvements for the game and explore other things that can be adjusted inside of pygame.