Publish Your Game
In this tutorial, you will learn how to export your game so that people can play it.
Playing Outside of Unity
Up until this point, you have been playing your game using the Unity Editor. This is great for testing your game and making rapid changes, but it would be a pain if your players all had to download Unity to play your game.
When you want to have other people play your game, you need to export it from Unity in a format that other people can play. This lesson will cover
As an example, this lesson will use the Bouncy Box project, but you can perform these same steps with the game type that you chose to make instead.
Preparing the Game for Export
To open the build settings window, select File > Build Settings to open the Build Settings window.
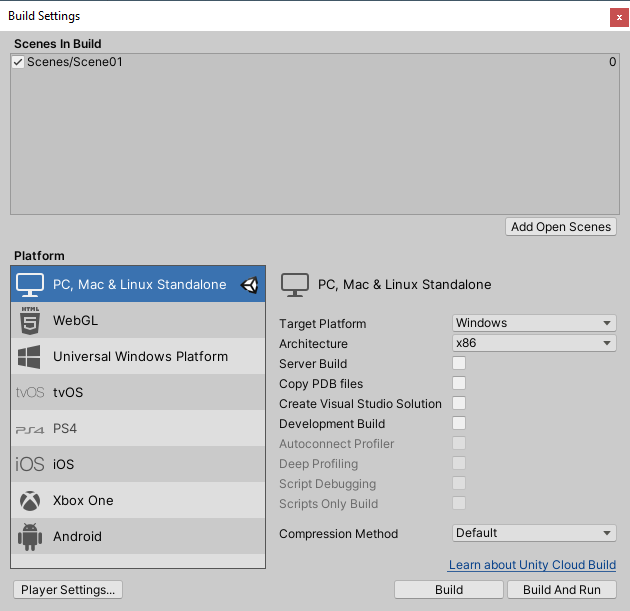
The build settings window three major parts.
The Scenes In Build section shows all the scenes that will be outputted with the built game. If you made extra scenes that won't be in the final game, uncheck them in this list to reduce the file size of the built game. If there are any scenes missing from this list, be sure to add them before you export the game.
The Platform Selection section shows all the different export methods you can use. For now, leave this selection on the default, PC, Mac & Linux Standalone.
The Export Options section shows all the different options you have as part of the export. If you are using a Mac, make sure the Target Platform is set to export to Mac.
The other important setting to know about is the Development Build setting. When you export with this option checked, you will get a special debug log when you play the exported build. This is helpful if you need to troubleshoot how the game is running on an exported build.
In the Scenes In Build list, you need to make sure that the scene you want players to visit first will be at the top. When you add scenes, they will appear at the bottom, so make sure to set up the scene your want to start at the top.
Exporting and Playing
You have two options on building and exporting your game. If you want to build the game and try it out later, select the Build button. If you want to build the game and try it out right after building, select the Build and Run button.
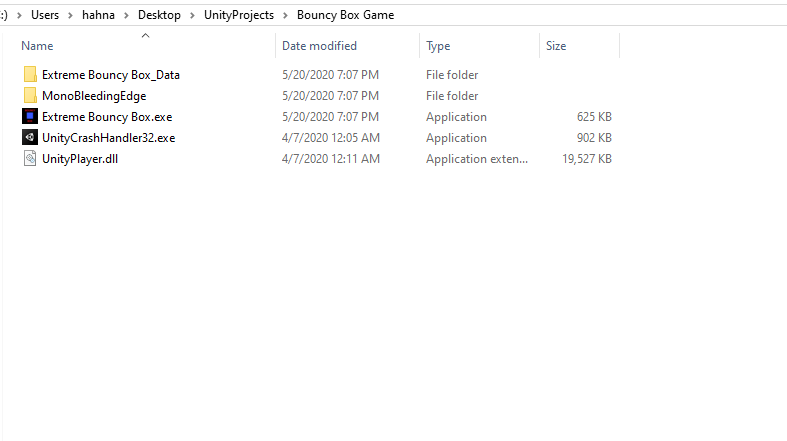
For now, select the Build button. Create a new folder for the built game, and then click Select Folder.
The build will be created inside of the folder, and if you double click the .exe file, then the game will begin playing.
It is important when you make your game to have a way for the player to quit. Make sure you have added something like a pause menu that will let the player exit the game.
Updating Player Settings
You have an exported game, but it's time to add some personal touches to the game. Click the Player Settings... button to open the Project Settings window.
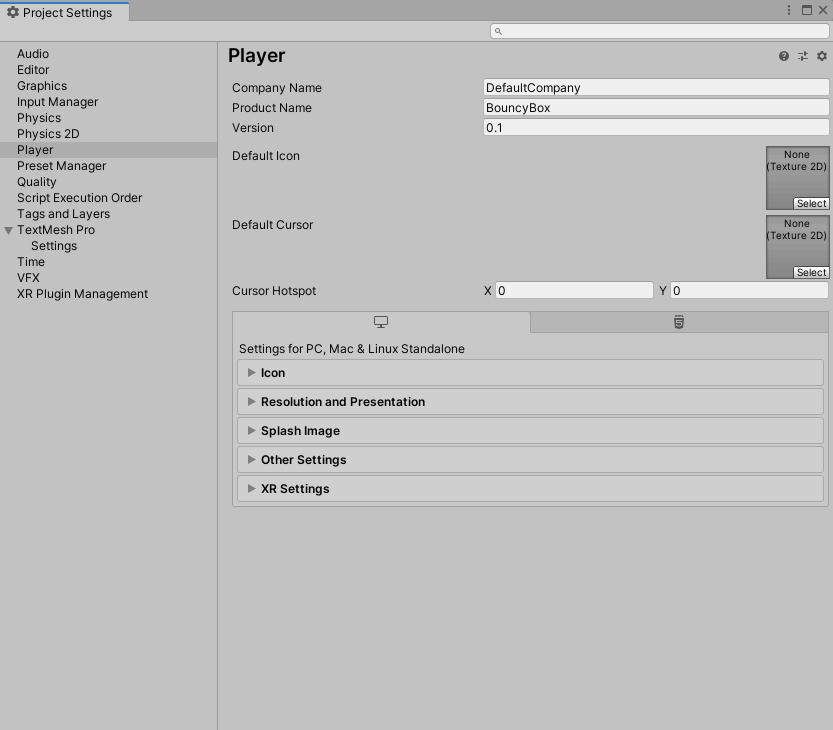
When you export a game, the Product Name field is used for the .exe file that is created.
The Default Icon field can be updated with a custom icon. This icon will be displayed on the .exe file.
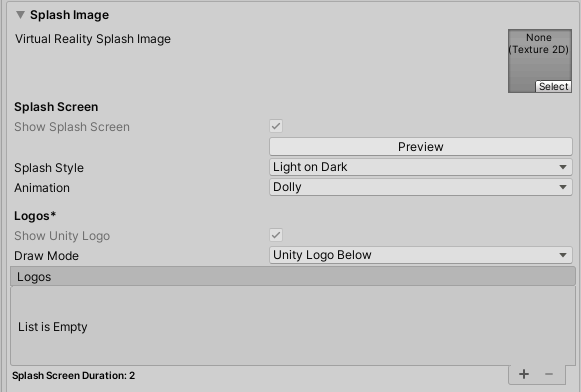
In addition to updating the icon for the game, most games usually have a splash image showing the name of the development studio.
The Splash Image section, you can add as many logos as you want into the Logos Section.
Exporting to WebGL/HTML5
Unity allows you to export to different platforms. In order to export to different platforms, you need to set up the export modules inside of UnityHub.
For any of your Unity installed versions, you can view which modules you have installed, and install additional modules. If you want to follow the instructions for this lesson to export to WebGL, make sure the WebGL module is installed.
When you export to WebGL, you can embed the game in a website, so that people don't need to download and install anything in order to play your game. Once the game is on a website, it can be played by anyone with a compatible web browser, no matter their operating system.
However, most computers will not let you play the WebGL build unless it is uploaded to a website.
Distributing Your Game
Once you have a built game, you can put your game into a zip file and put it on a file sharing site, such as Google Drive, or you could put it on a game distribution platform.
Steam
Although Steam has a lot of professional games that can be purchased and downloaded, you could upload games through the Steam Direct program. However, in order to upload games you need to pay a $100 fee for each game, so this is a good distribution platform only when you're sure your game is going to make money.
GOG (Good Old Games)
While GOG is better known as a site for classic games, they also have Indie Game Development support. However, they are very selective when it comes to the games they host on their site and allow you to make money off of, so this is only a good option wheen you have a well-polished game.
Kongregate
If you create a WebGL build of your game, you could upload it to Kongregate through their Game Submission Program. Instead of requiring payment up front, they make money through running ads along with hosting your game. This is a good option if you have a WebGL build and think that your game is good enough to make money off of.
Newgrounds
Newgrounds has been around for a long time, and was well known as a site where creators uploaded flash animations and flash games. Now that Flash no longer works on modern browsers, game developers can upload WebGL games to the site. Newgrounds is a site that has a lot of very simple games, so if you come up with an original game idea that you want to see if people like, it can be a good place to upload and get feedback on your idea. You can read more about this site in the Newgrounds Wiki Page.
Itch.io
Itch.io is a popular platform among indie developers. It allows you to upload games for free in a variety of formats, including .exe and WebGL. If you want to make money, you can also sell your games on the platform. The Itch Developers Page has more information
If you want to upload your game so that people can play it from the web, the next step will explain how the steps to upload your game to Itch.io.
Uploading a Game to Itch.io
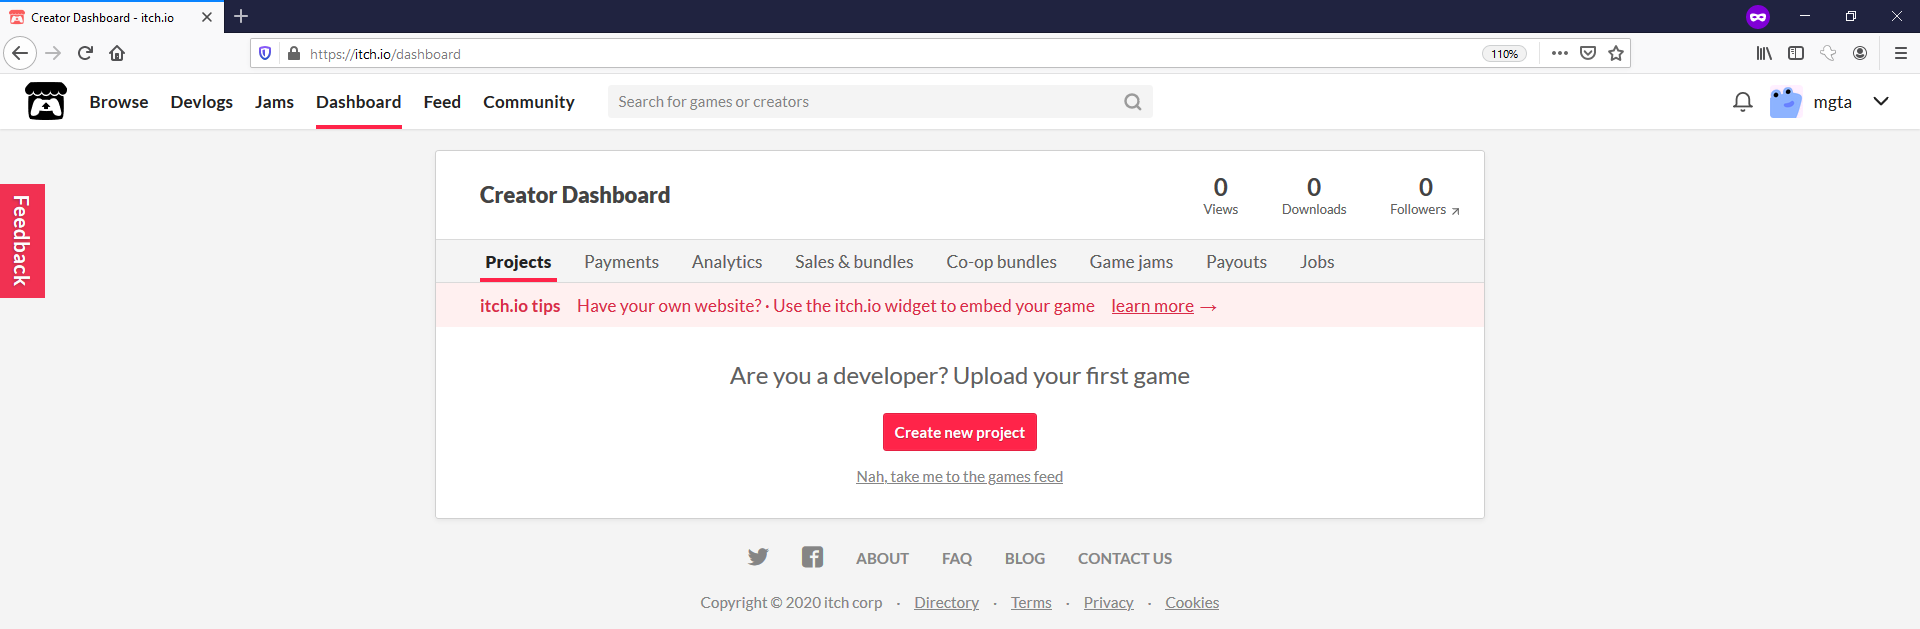
To upload your game to Itch.io, you will need to create an account. After you have created an account, login and go to your Dashboard Page.
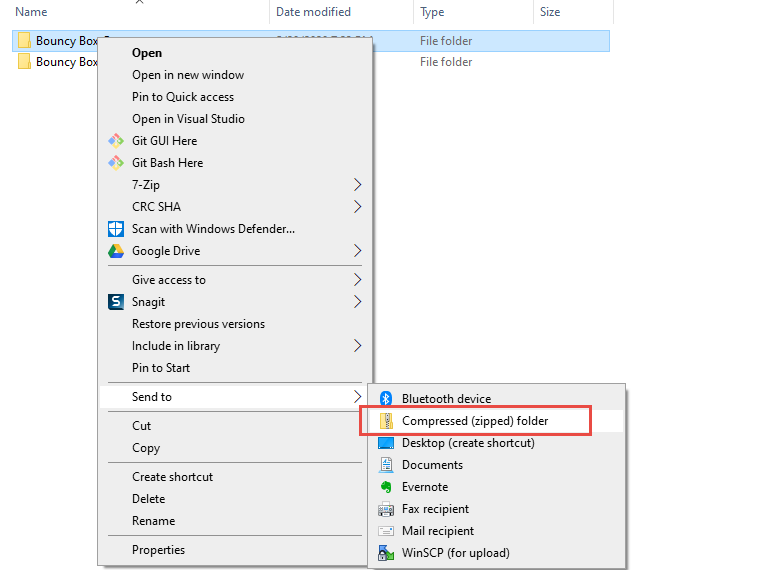
Before you upload your file, you will need to put your built game inside of a zip file.
Then, you can create a project page. You can create a project page for your .exe files by uploading the zip for those files
If you want to create a page where people can play the game in the browser, you have to create an HTML5 Project.
After you've saved the page in draft mode, you can go back and make it public. Usually, you want to make your game public after you've added a main image, a gameplay video, and a description.
Once your page is public, you can share the link to your game with whoever wants to play it. It can also be found by people searching on the itch,io website.