Unity Basics
In this tutorial, we will explore the Unity Interface. You will learn to navigate a scene and manipulate objects within 3D space.
The Unity Interface
When creating a NEW Unity project, select the 3D option, enter a project name, and choose a desired location to save the project files.
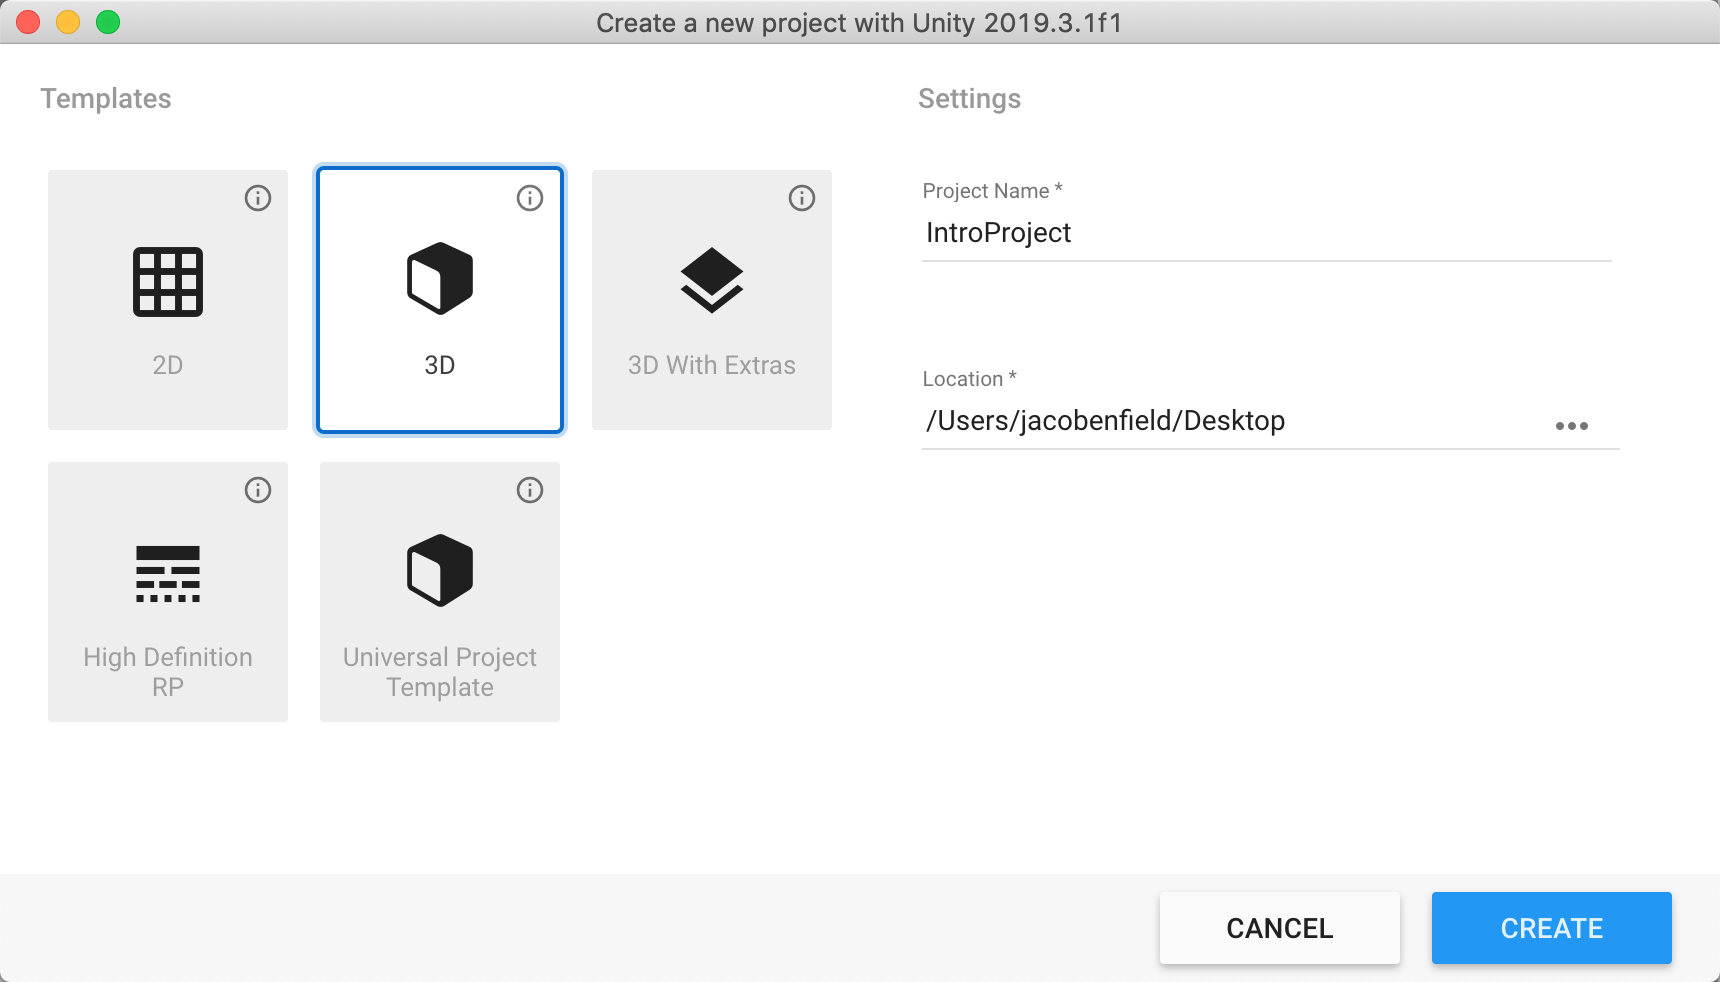
As soon as you click the CREATE button, your project will open in the Unity game engine.
Within Unity, you can open, close, and move windows to a layout that is conducive to your general workflow or to a specific task. There are several layouts provided by Unity in the Layout dropdown menu located at the top-right of the Unity interface.
You can always select Default to return back to the default layout that is used throughout most of the book.
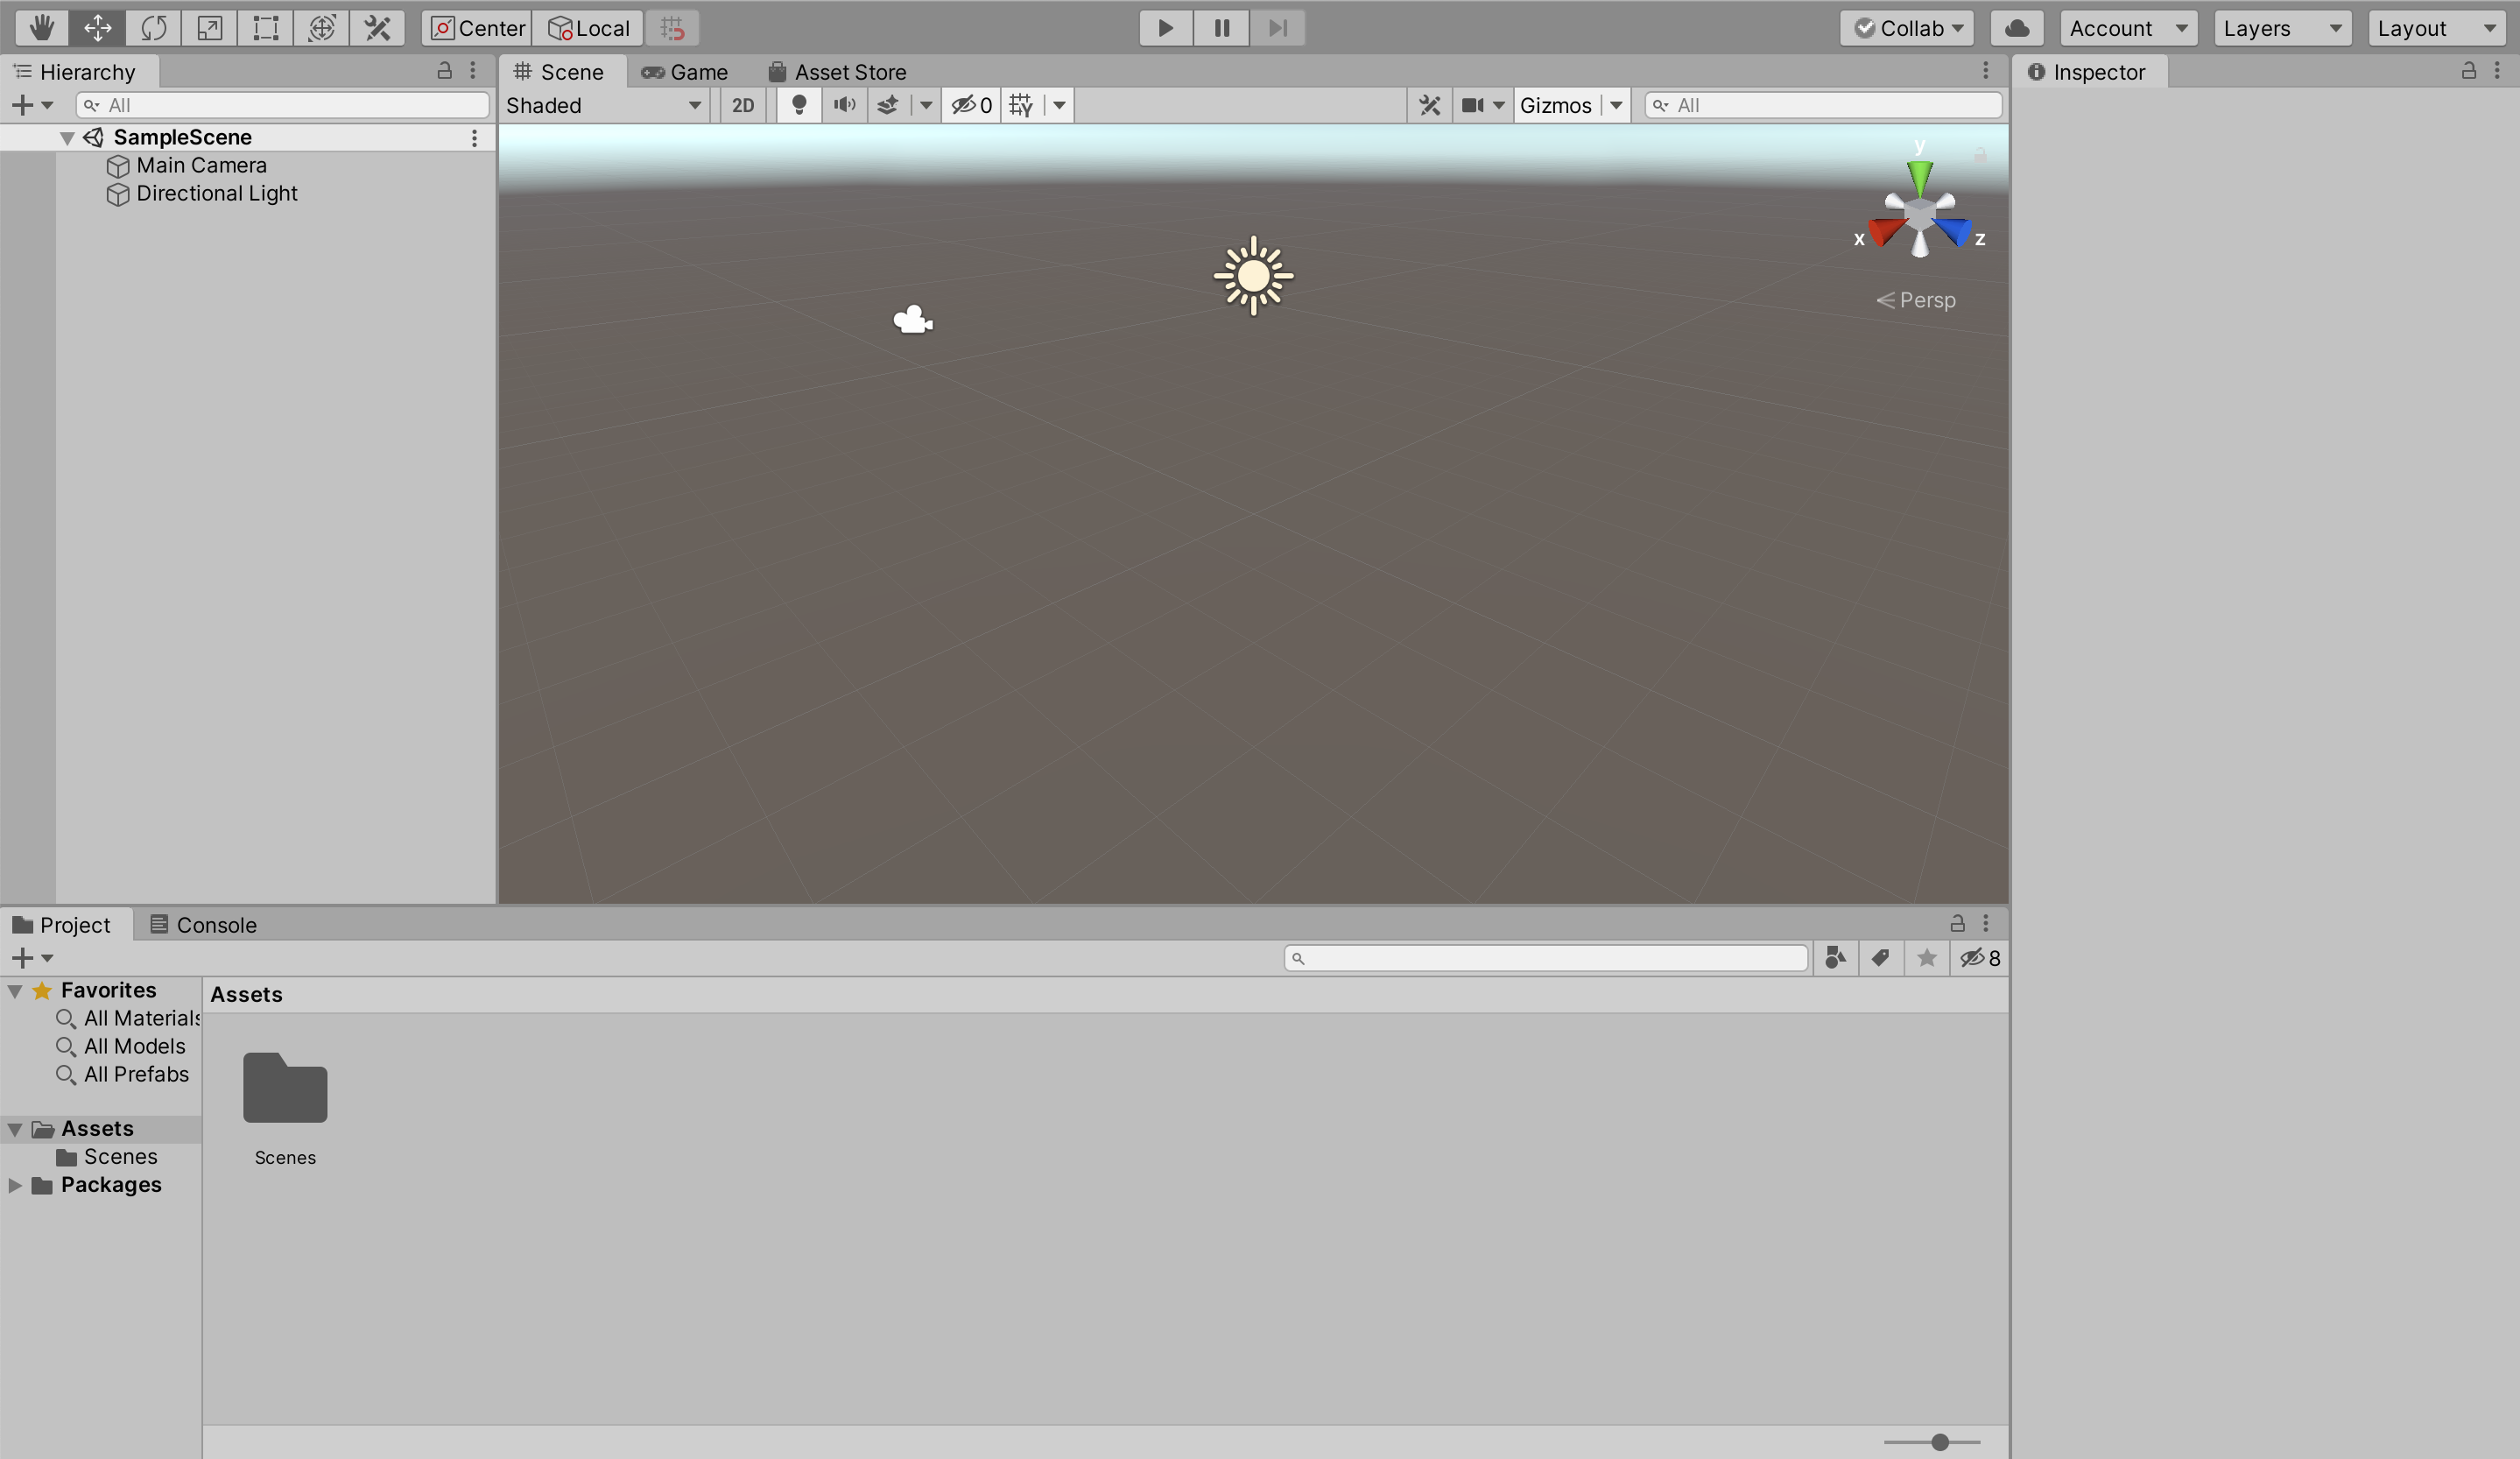
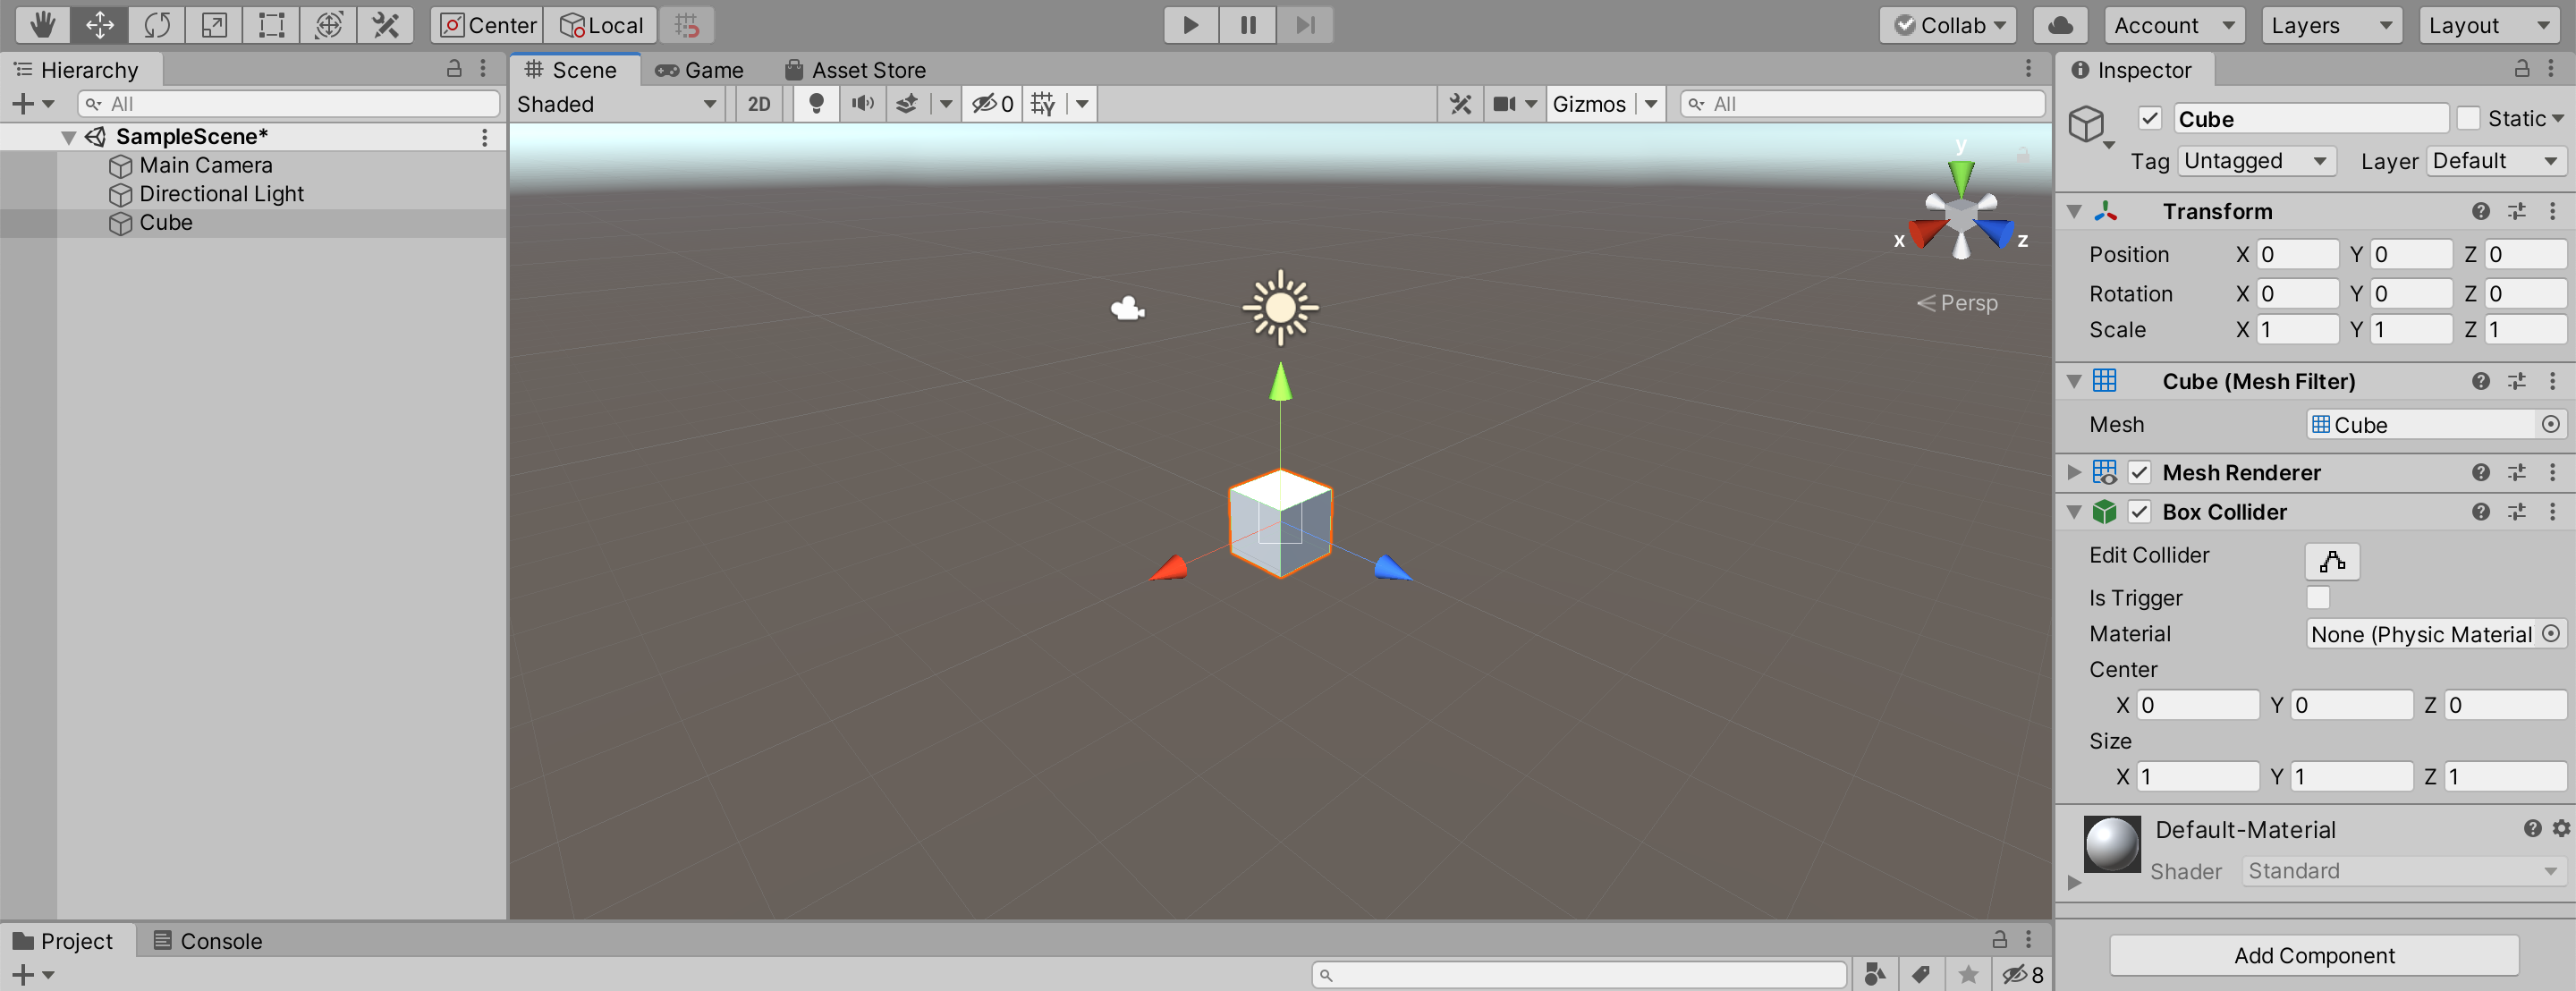
Let's take a look at the UI elements and windows that are visible in the default layout.
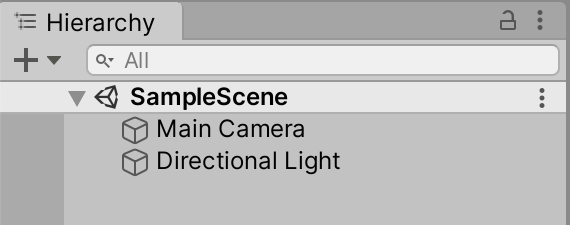
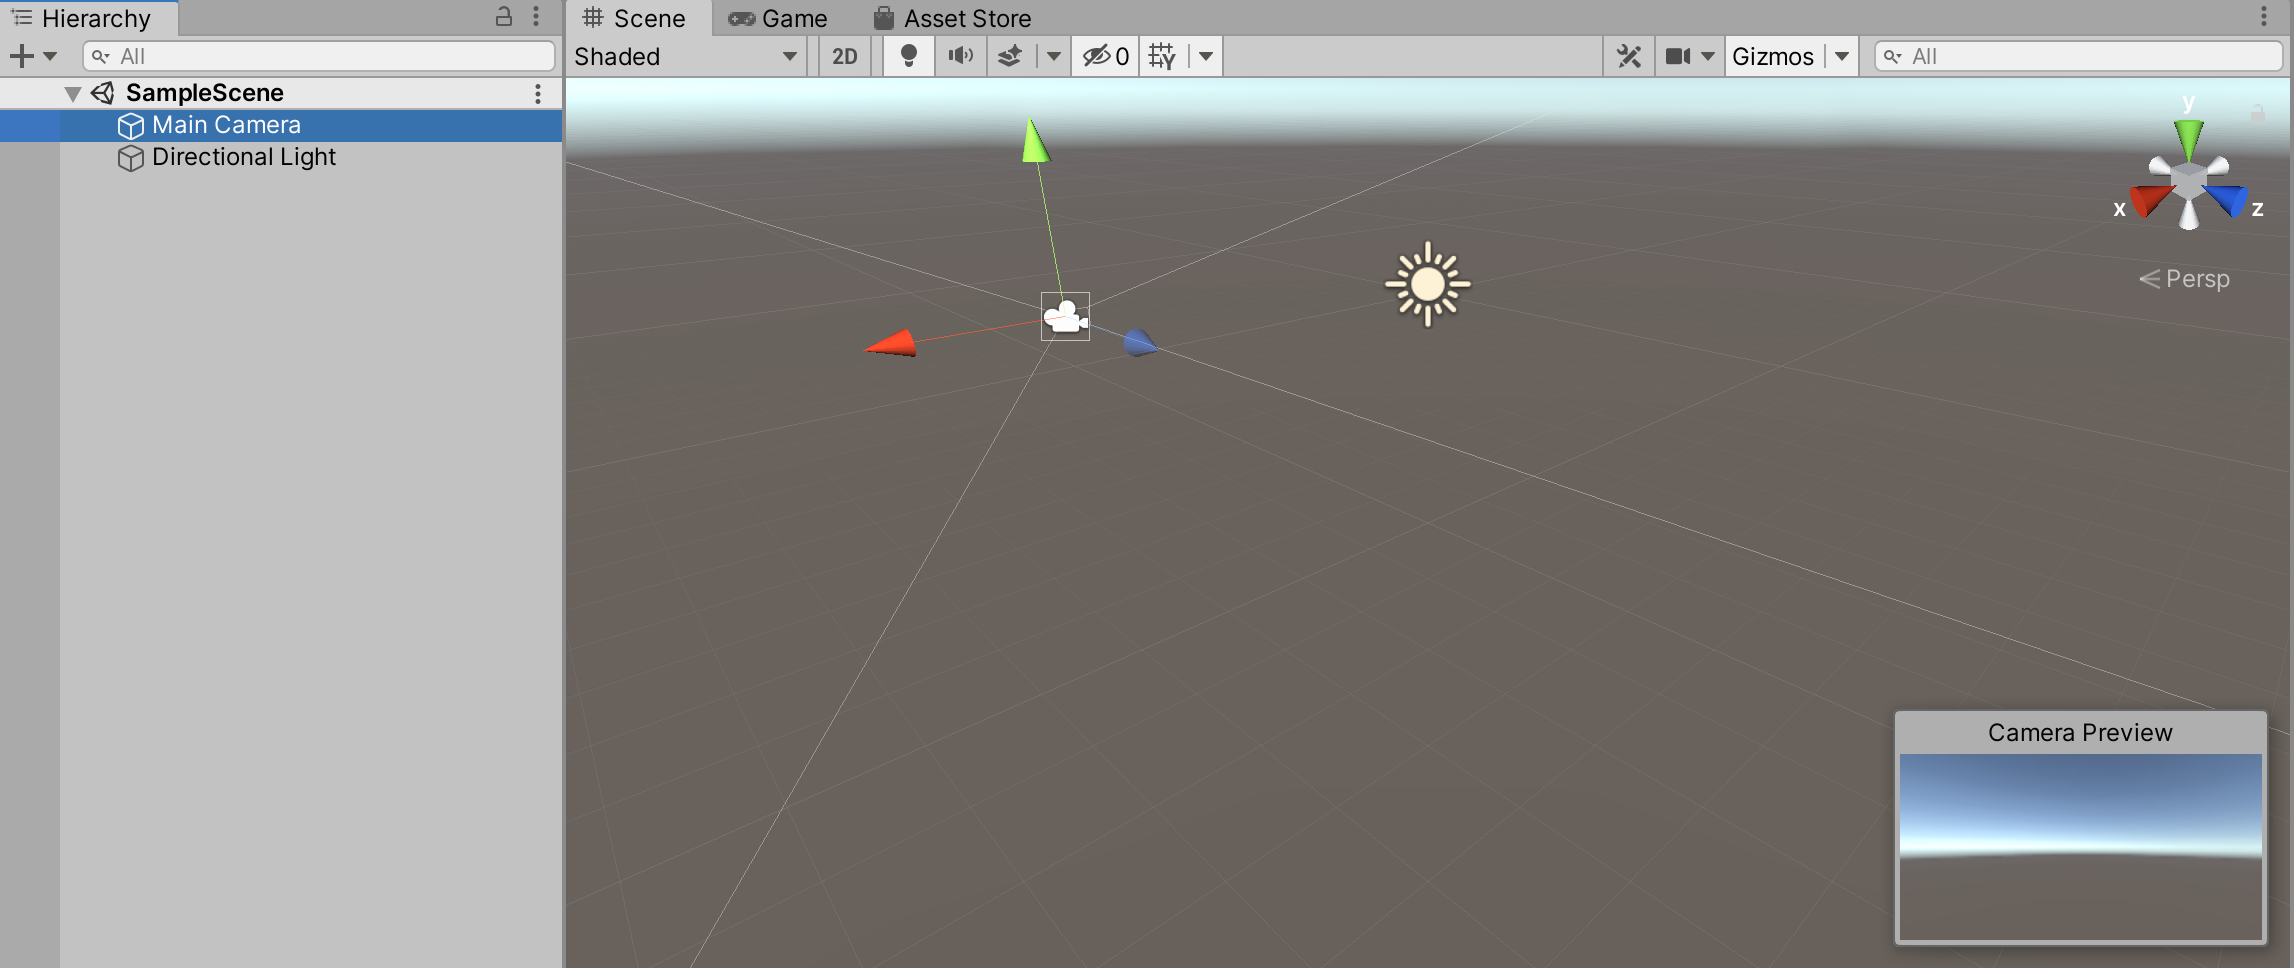
The Hierarchy Window displays a list of all GameObjects in the currently open Scene. A new project starts with one scene named SampleScene that includes two GameObjects; a Main Camera and a Directional Light. The Main Camera provides a view of the game world to the player. The Directional Light lights up the scene so the player is not in complete darkness.
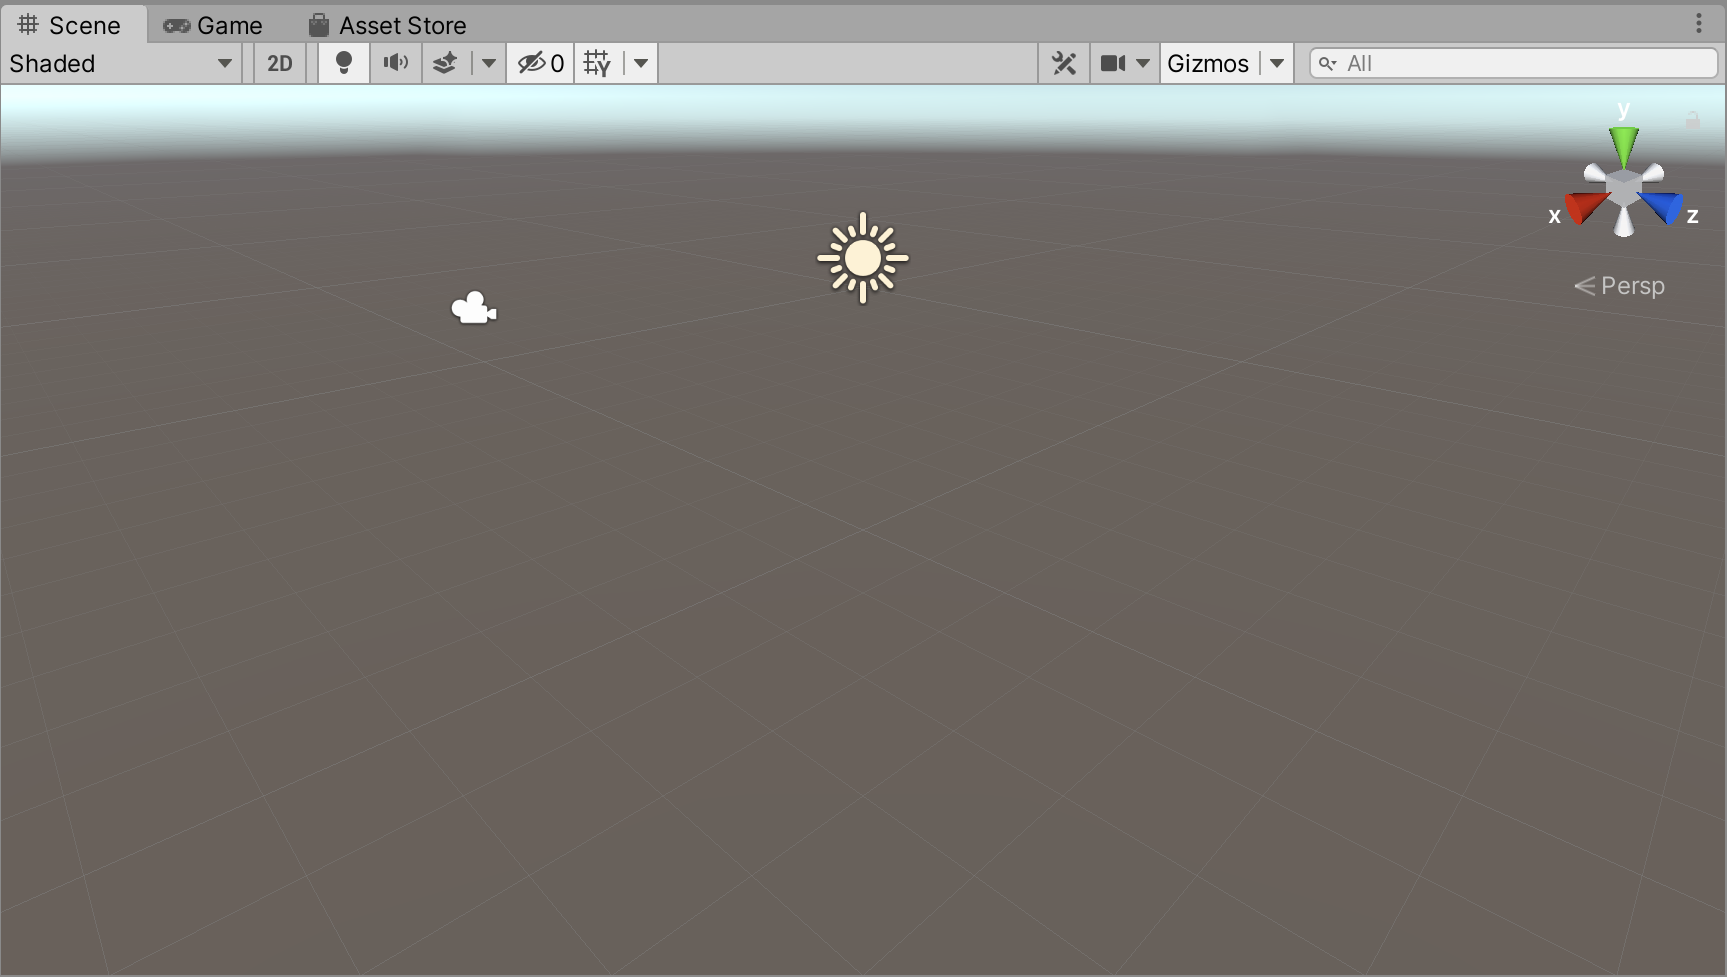
The Scene Window displays the scene. The Directional Light has no actual size but its location is indicated by a gizmo, the icon that looks like a sun. Similarly, the camera gizmo indicates the location of the Main Camera which also has no size. Gizmos are visible during editing, but not when the game is running. The blue horizon in the scene is a result of the default sky box, which helps us see our scene as a 3D space.

At the top of the Scene Window, there are several buttons that you may find useful. Hover over the buttons for a brief description of what each is used for.
Clicking on an object in the Hierarchy selects it in the Scene as well. When the Main Camera is selected, faint lines appear to indicate the direction the camera is facing. The view that camera has of the scene is shown through a Camera Preview that appears at the bottom-right of the Scene Window.
Clicking within a Window gives that window focus. A blue line appears over the tab of the window which currently has focus. Keys pressed on the keyboard may cause different behaviors depending on which window has focus. For instance, pressing the arrow keys when the Scene Window has focus causes a different behavior then pressing the arrow keys when the Hierarchy Window has focus. Using arrow keys is just one of many ways to navigate a scene. Other methods will be discussed later in this lesson.
In the default layout, the Game Window is in the same set of windows as the Scene Window. Click on the Game tab to switch to the Game Window.
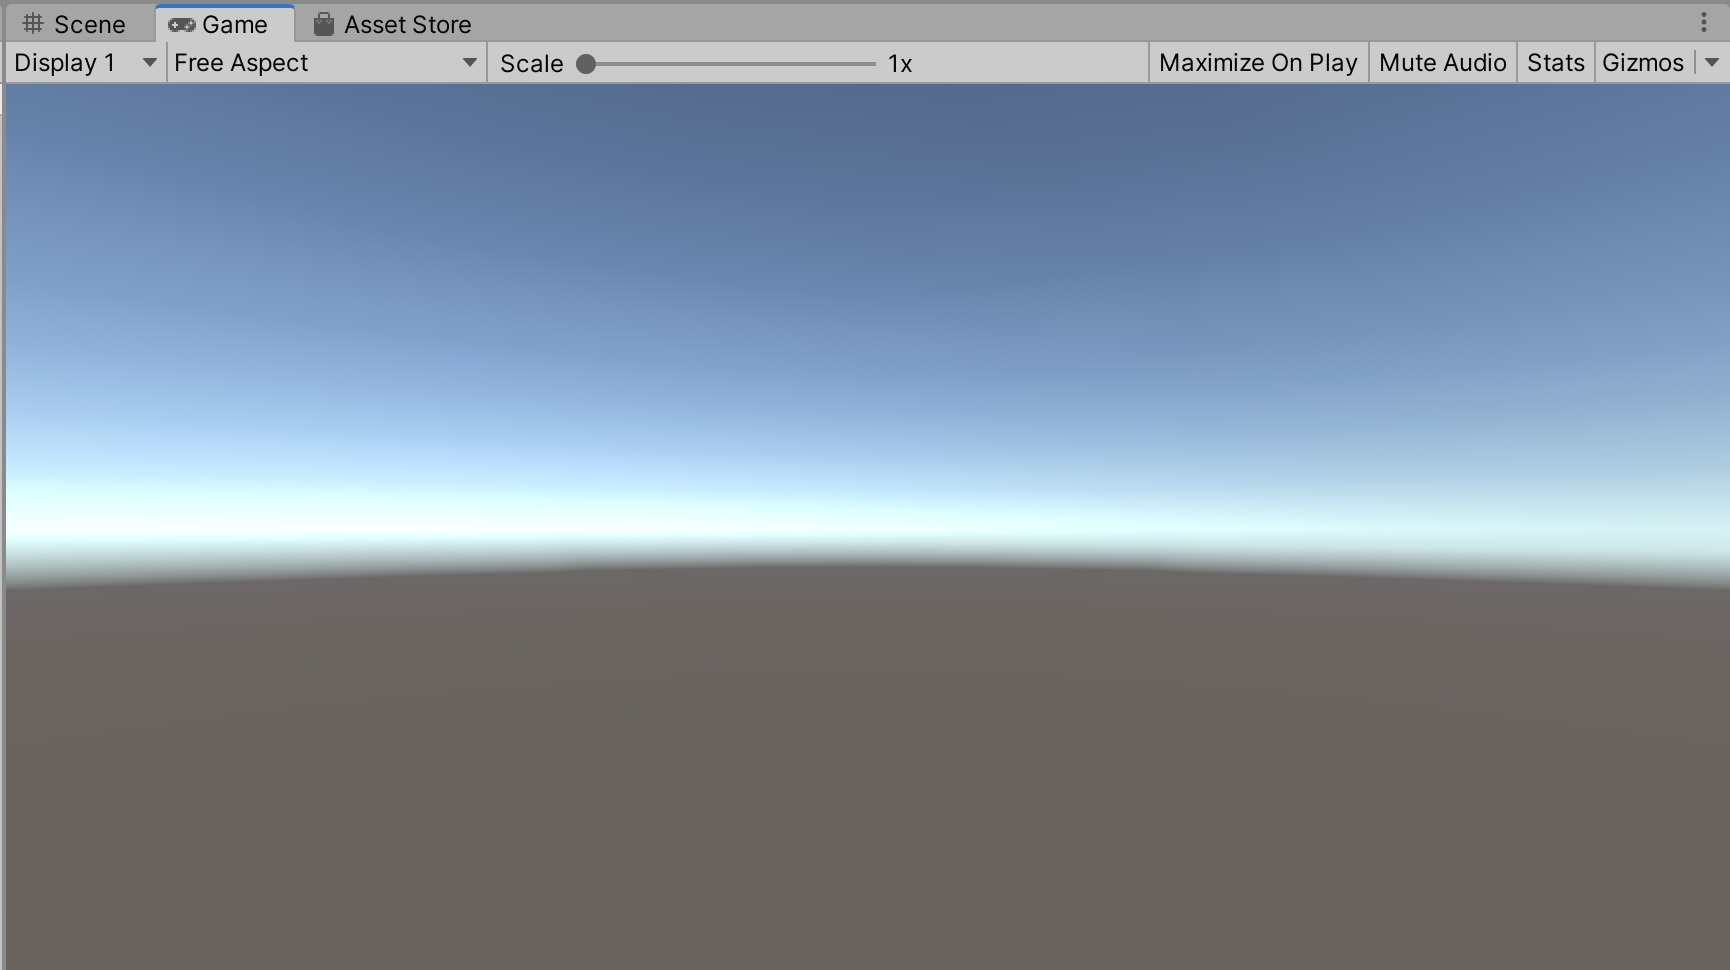
The Game Window displays the game through the Main Camera. Unity will automatically display the Game Window when the game is played.
If you are ever unable to click on objects in the scene to select and edit them, you are likely in the Game Window instead of the Scene Window.

The Inspector Window shows the name of the selected GameObject and all of its components. If no GameObject is selected, the Inspector window is empty.
The checkbox next to the GameObject's name can be used to toggle the GameObject off and on. This is sometimes useful when you want to temporarily remove an object from the scene without deleting it from the hierarchy.
Similarly, components of a GameObject can be toggled to enable and disable a component if there is a checkbox next to the component name.
The Project Window provides a view of all files that are saved in your project folder regardless of whether or not they are being used in the currently open scene.

New projects always have an Assets folder to save the assets (textures, materials, 3D models, sprites, audio, scripts, etc.) for the game. The Scenes folder in the Assets folder contains the default SampleScene file.
The files you see in the Project Window match the files in the folder on your computer where you saved the project.
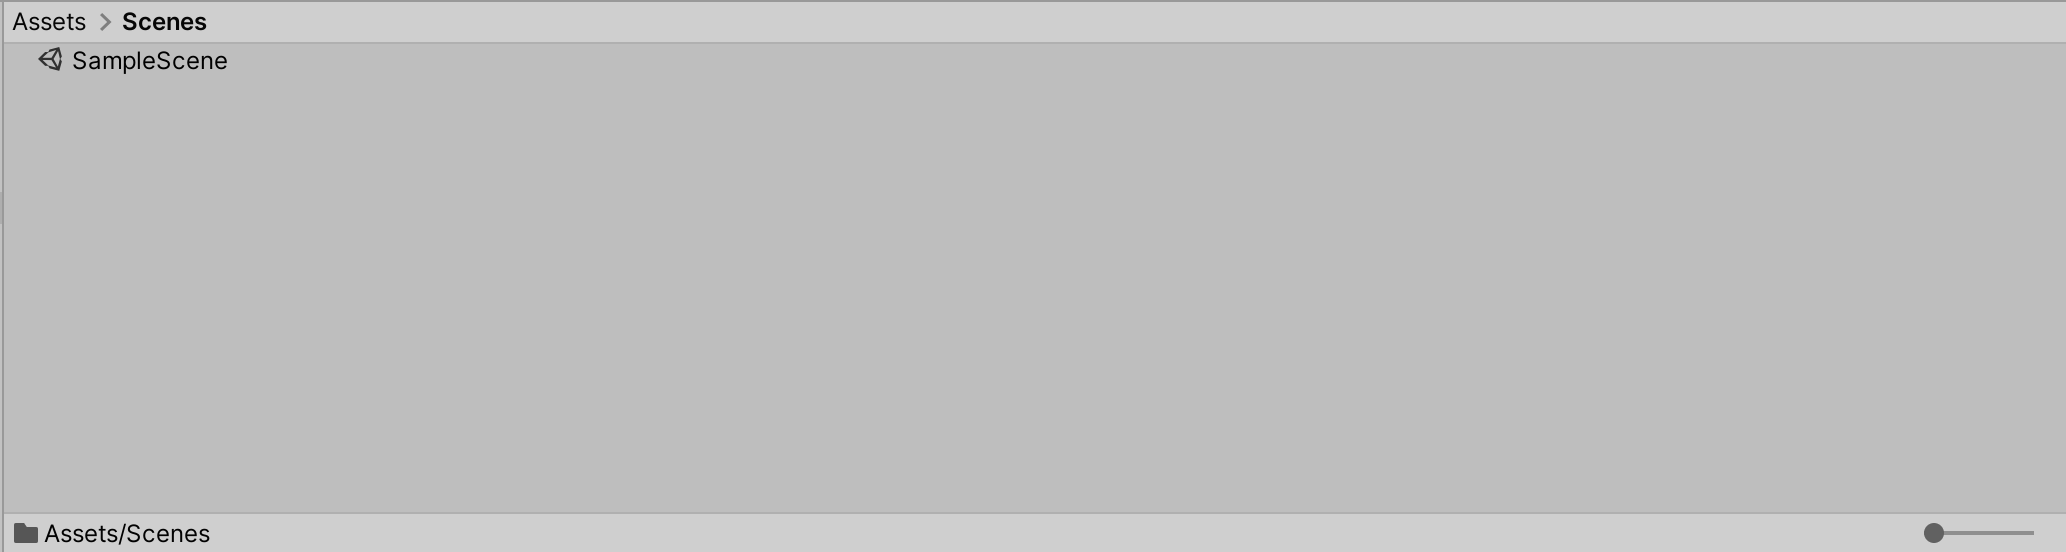
As the number of files in the project grow, you may want the folder and file icons to be smaller, or even to be displayed in list view. You can do this by moving the slider at the bottom-right of the Project Window to the left.
The Play button is located at the top, center of the Unity interface. Pressing the Play button will automatically display the Game Window and begin running your game within Unity.

Pressing the Play button again will stop the game.
Be sure to always stop the game before editing. While it is possible to manipulate GameObjects through the Inspector window while the game is running or paused, which is sometimes useful for testing purposes, changes made while the game is running will not be saved.
Game Objects
Every object in your game is a GameObject. Including characters, cameras, lights, sounds and special effects. GameObjects have properties that we can edit to make them do different things.
Everything in the hierarchy is a GameObject. Click on the Main Camera GameObject to view its components and properties in the Inspector Window.
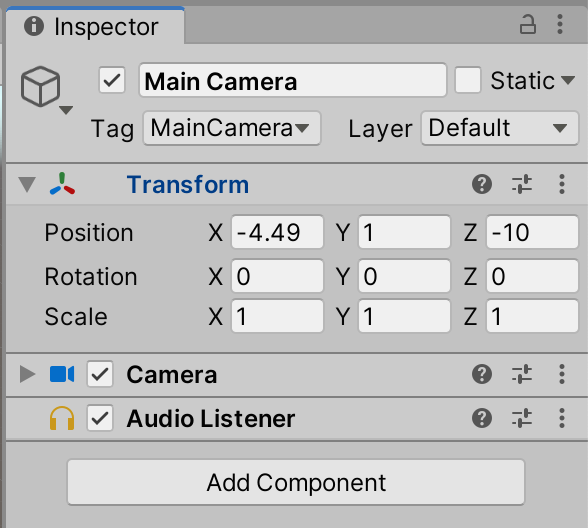
This GameObject is named
Main Cameraand also has a tag of MainCamera. The name or tag can be used in code to access a GameObject.
The Main Camera GameObject has three components; a Transform, a Camera, and an Audio Listener. Use the triangles next to each component to expand and collapse the properties of the component. Think of components as the building blocks of a GameObject.
Notice that the Camera Preview appears and disappears as the Camera component is expanded and collapsed.
The only component that is required for all GameObjects is a Transform. This is why there is no checkbox next to the Transform to allow it to be toggled off as there is for the other components. A Transform consists of a Position, Rotation, and Scale with three properties (X, Y, and Z) defining each.
The initial values of properties when the game begins can be set in the Inspector Window using checkboxes, text fields, and other UI elements. You can often change values more quickly by clicking on the label of the property (not the value itself) and dragging left or right. Try this method to change the X property of the Main Camera's position. As you drag left or right, you should see the value change and the Main Camera move in the Scene view.
The Main Camera and Directional Light have no physical manifestation within the game, so they have no size. GameObjects that have no size do not appear during gameplay, even if their values for their scale change.
To add a GameObject that will appear in our game, right-click in an empty area of the Hierarchy Window and hover over 3D Object. Here you can see some of the primitive GameObjects that can be quickly added to the game.
While you will generally use custom created 3D models for most of the game assets, game programmers often will use simple shapes to quickly start developing the game, and then replace that shape with the custom 3D model when it is ready.
This practice, called gray boxing, is also useful for rapid prototyping. You can start testing your game concept to ensure it is fun before spending the many hours required to create beautiful 3D models and animations.
Select Cube to add a cube to the scene.
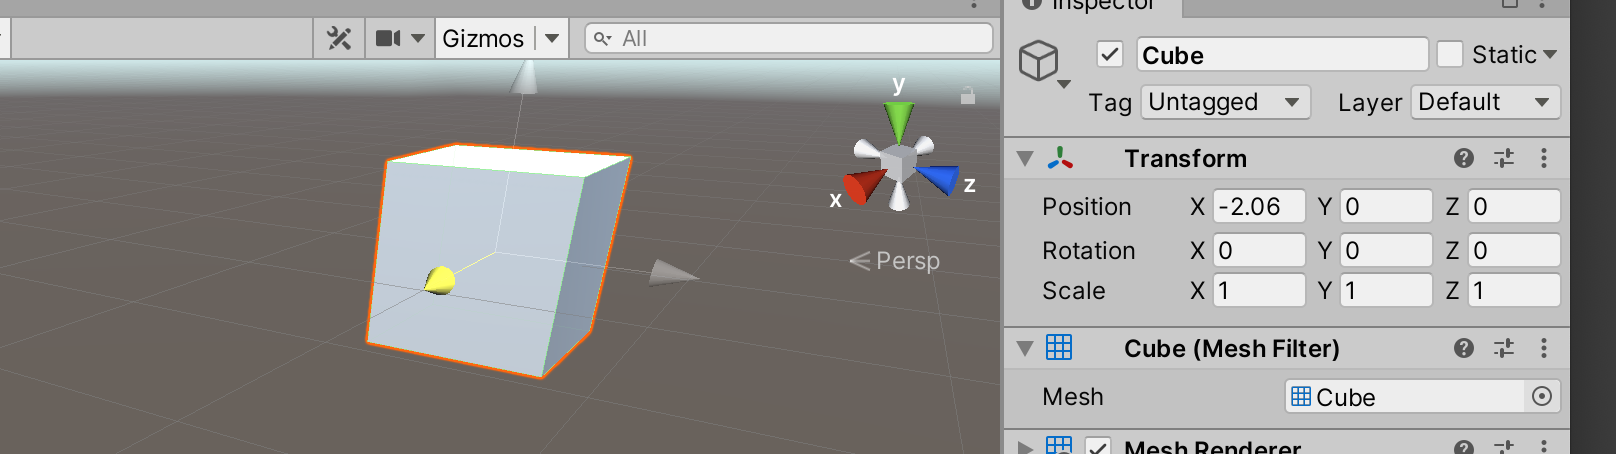
The Cube appears in the Hierarchy and Scene windows. With the cube selected, it’s components and properties appear in the Inspector Window. Arrows appear around the cube if the Move Tool, which will be discussed in the next section, is selected.
The name of the cube can be changed in the Inspector Window to
Player, or any other item the GameObject is intended to represent. Naming GameObjects when you create them is highly encouraged to ensure that as the number of GameObjects in the Scene can grows, a specific GameObject can easily be found through the Hierarchy Window. Additionally, giving meaningful names to GameObjects may be helpful when writing code that needs to access those objects by name.
Components can be added or removed from the Cube to change its look or behavior. For now, take a look at the components that come with the default Cube.
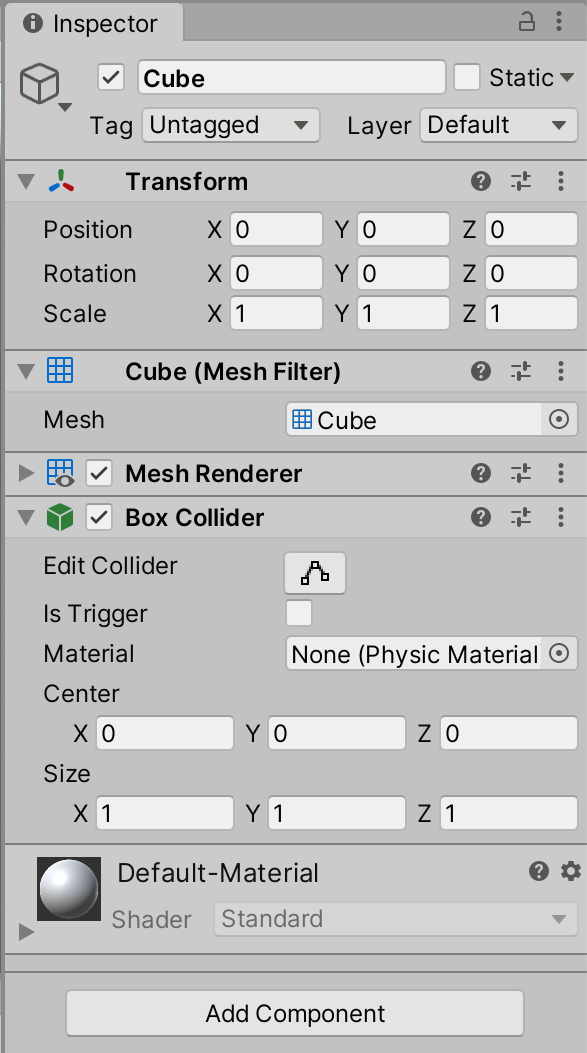
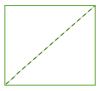
The Cube (Mesh Filter) component represents the physical form of the object. Meshes are made up of triangles in 3D space. For instance, one side of a cube could be defined by two triangles.
The Mesh Renderer is used to render (draw) the mesh by showing the faces of all the triangles. Think of the Mesh Renderer as the skin of a GameObject.
The Default-Material defines what material will be used when rendering the mesh.
The Box Collider is initially the same shape of the cube and is used to determine whether or not the GameObject is colliding with other GameObjects.
If you toggle off the Mesh Renderer, leaving the Box Collider expanded and toggled on, you will see the edges without the mesh.

Colliders on GameObjects do not have to be the same size or shape as the object they are attached to. In fact, one GameObject can have multiple colliders or have no colliders at all. For example, the Main Camera and Directional Light do not have colliders.
Be sure to enable the Mesh Renderer because without doing so the cube will not be visible when it is deselected or when the game is played.
Edit the Scene
To edit the scene quickly and effectively, you need to become skilled and efficient in navigating the scene and manipulating objects within a 3D space.
One of the most important skills in game development is the ability to move through a scene to design a level of a game or find items that need to be modified. Try out some of the methods listed below for navigating a scene in your own project.
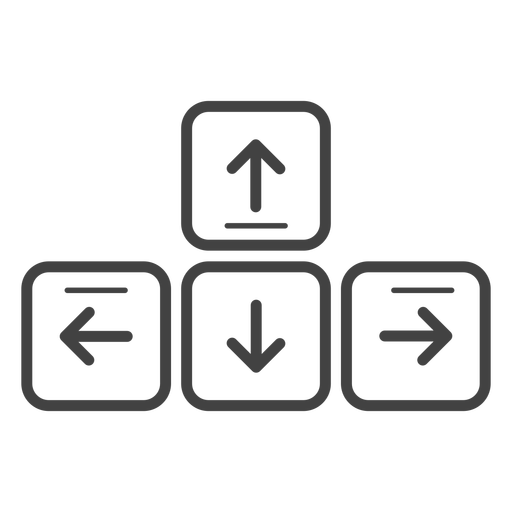
When the Scene Window has focus, the left and right arrow keys allow you to pan to the left and right of the scene while the up and down arrows allow you to zoom towards or away from the center of the scene view.
Right-click and drag in the Scene Window to rotate the view. This keeps the camera (that you are looking through) in the same position as you look around. Think of this as standing in one place in the scene while moving your head to look around.
Scroll up and down to zoom towards and away from the center of the scene view.
Holding the Alt key down, right-click and drag in the Scene Window to zoom towards or away from the location of your cursor.
Double-click on any GameObject in the Hierarchy to zoom to that object and give it focus.
Double-click on a GameObject in the Hierarchy Window or click on the object in the Scene Window to give it focus. Then hold the Option key down, click and drag to orbit around the GameObject.
The icons above the Hierarchy Window provide tools for navigating the scene as well as for manipulating objects.

Hover over the buttons to see the name of each tool.
The top row of letters of a typical keyboard serve as shortcuts for quickly switching between the tools.
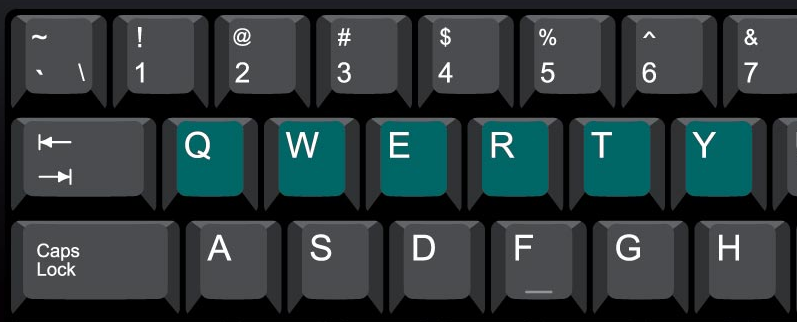
The keys are in sequence with the icons, with the Hand Tool being activated by Q, the Move Tool with W, and so on.

With the Hand Tool selected, click within the Scene Window and drag to pan the view of the scene. Panning the scene does not move any objects in your scene; it simply changes your view of the scene.

With the Move Tool selected, click on any GameObject to move it. Clicking directly on the arrows that appear on the selected object and dragging will allow you to move the object along a single axis.
When you click on an arrow and move the object along an axis, the related values for the object's position update in the Inspector Window.
You can also click where the three arrows meet to move the GameObject without being restrained along a single axis, though this can make it difficult to place objects as intended within a 3D space.

With the Rotate Tool selected, click on any object to rotate it. Clicking directly on the circular lines that appear around the selected object and dragging will allow you to rotate the object along a single axis.
When you click within the circles instead of directly on them, the rotation will not be restrained to a single axis. Again, as you make rotations in the Scene Window, the values should automatically update in the Inspector Window.

With the Scale Tool selected, click on an object which has a physical representation in the game to resize the object. Clicking directly on one of the three outer blocks that appear around the selected object and dragging will allow you to scale the object along a single axis.
However, often times you will want to scale an object while constraining its proportions to avoid stretching it too far in one direction. This is especially true when using 3D models instead of primitive shapes. To scale the object on all three axes at the same time, click on the center block and drag.
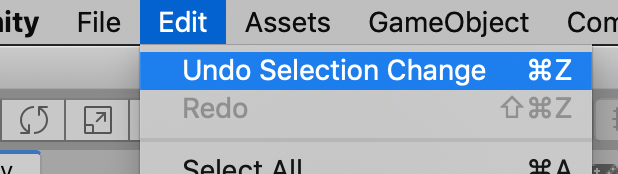
Like most complex software, Unity uses many shortcut keys to provide more efficient methods to complete tasks. You can learn many of these shortcuts from the drop-down menus. For instance, you can see the shortcuts for common Edit functionality are consistent with most other creative software, including Ctrl X to cut, Ctrl C to copy, and Ctrl V to paste. The Ctrl Z shortcut is frequently useful to undo a change and can be pressed multiple times to undo several changes.
Save the Scene
A long held practice when working on computers is to avoid losing work by saving often. You should do the same with your Unity projects.
An asterisk next to the scene name in the Hierarchy Window indicates that the scene has not been saved since the last change.

Using the Ctrl S shortcut to save the scene, the asterisk will disappear until another action occurs. Using the save shortcut is encouraged because you should save often.
Complete the Hunt
It's time to put your skills of scene navigation and object manipulation to the test.
In this scavenger hunt, you will search through a Unity Scene to find missing animals and return them to their proper place. Use the following steps to setup and complete the hunt.
- Download the Animal House project.
- Extract the files from the zip file and place them in your preferred location on your computer.
- Open Unity Hub.
- Click
ADD
in the upper right corner. - Find the unzipped animalHouse folder and double click it.
- Select the folder named Animal House.
- Click
Select Folder
in the lower right. -
Choose a version of Unity to open the project in.
You will often be asked in this course to open Unity projects where your installed version does not match the project version. Because Unity updates so often, it is impossible to predict which version Unity you will have installed when taking this course.
When you see the project in your list of selectable projects after adding it, it will show up as gray, because you will need to convert the project version into the Unity version that you have installed.
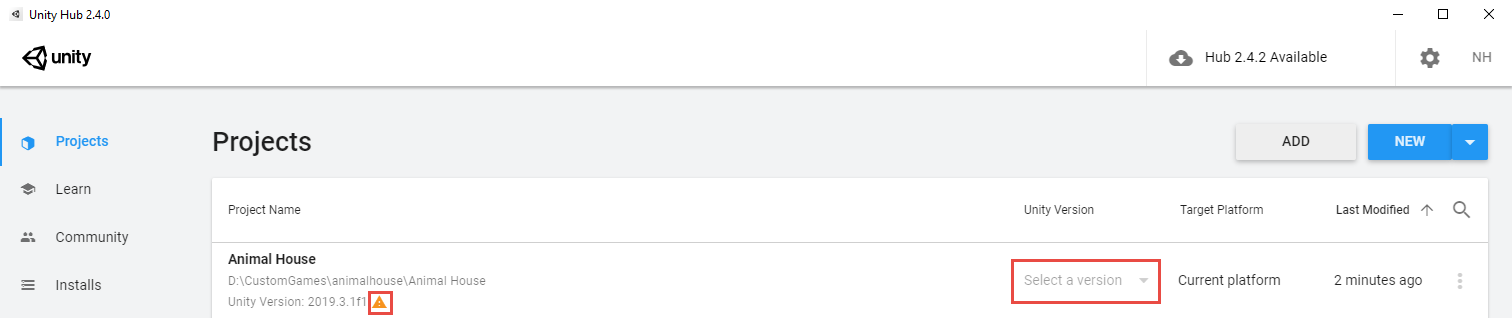
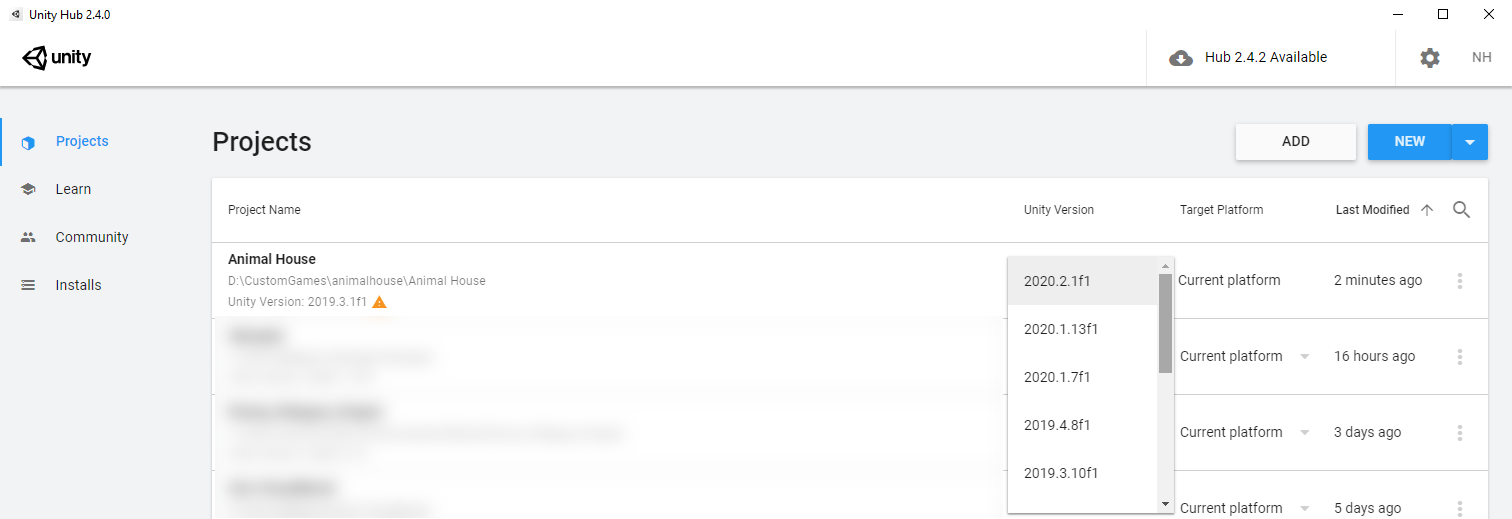
To convert the project, click the dropdown arrow next toSelect a version
and select your installed Unity version. If you have multiple Unity versions installed, try to select the version that is newer than the project but most closely matches its project version. In the screenshot below, a Unity version was selected that was newer than the project version, but not the newest Unity version installed (2019.3.10f1).
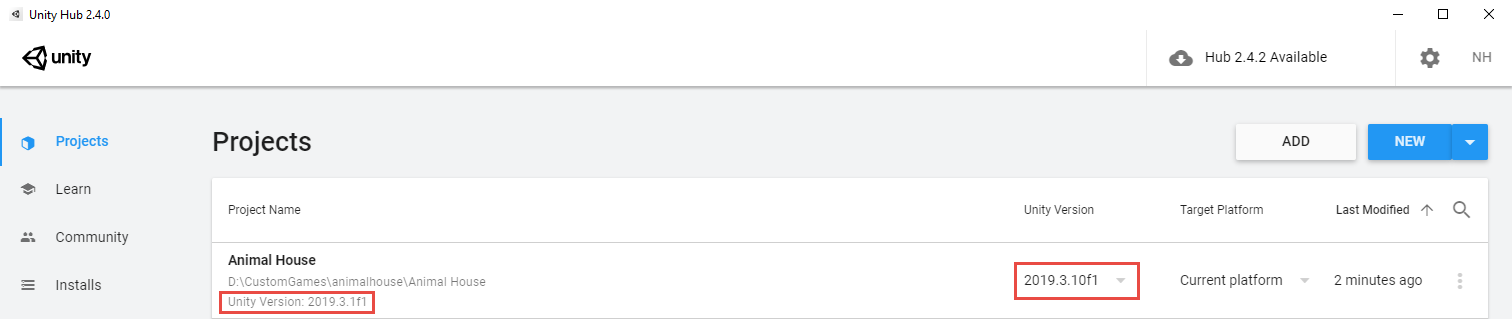
After you select the version, the warning icon will disappear, and you will see the version you selected. Click the project to open it.
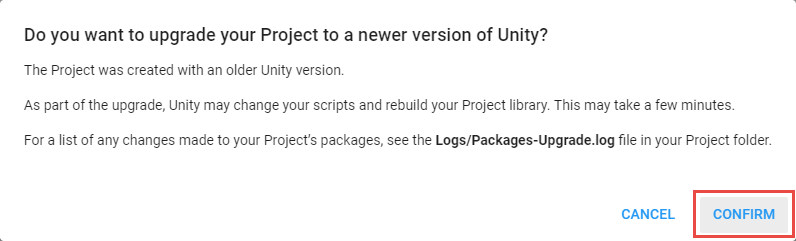
When you attempt to open the project, it will show you a warning message. ClickCONFIRM
to continue with the conversion progress. If you see any other warning messages, continue with the version conversion process.
-
Click on the project to open it.
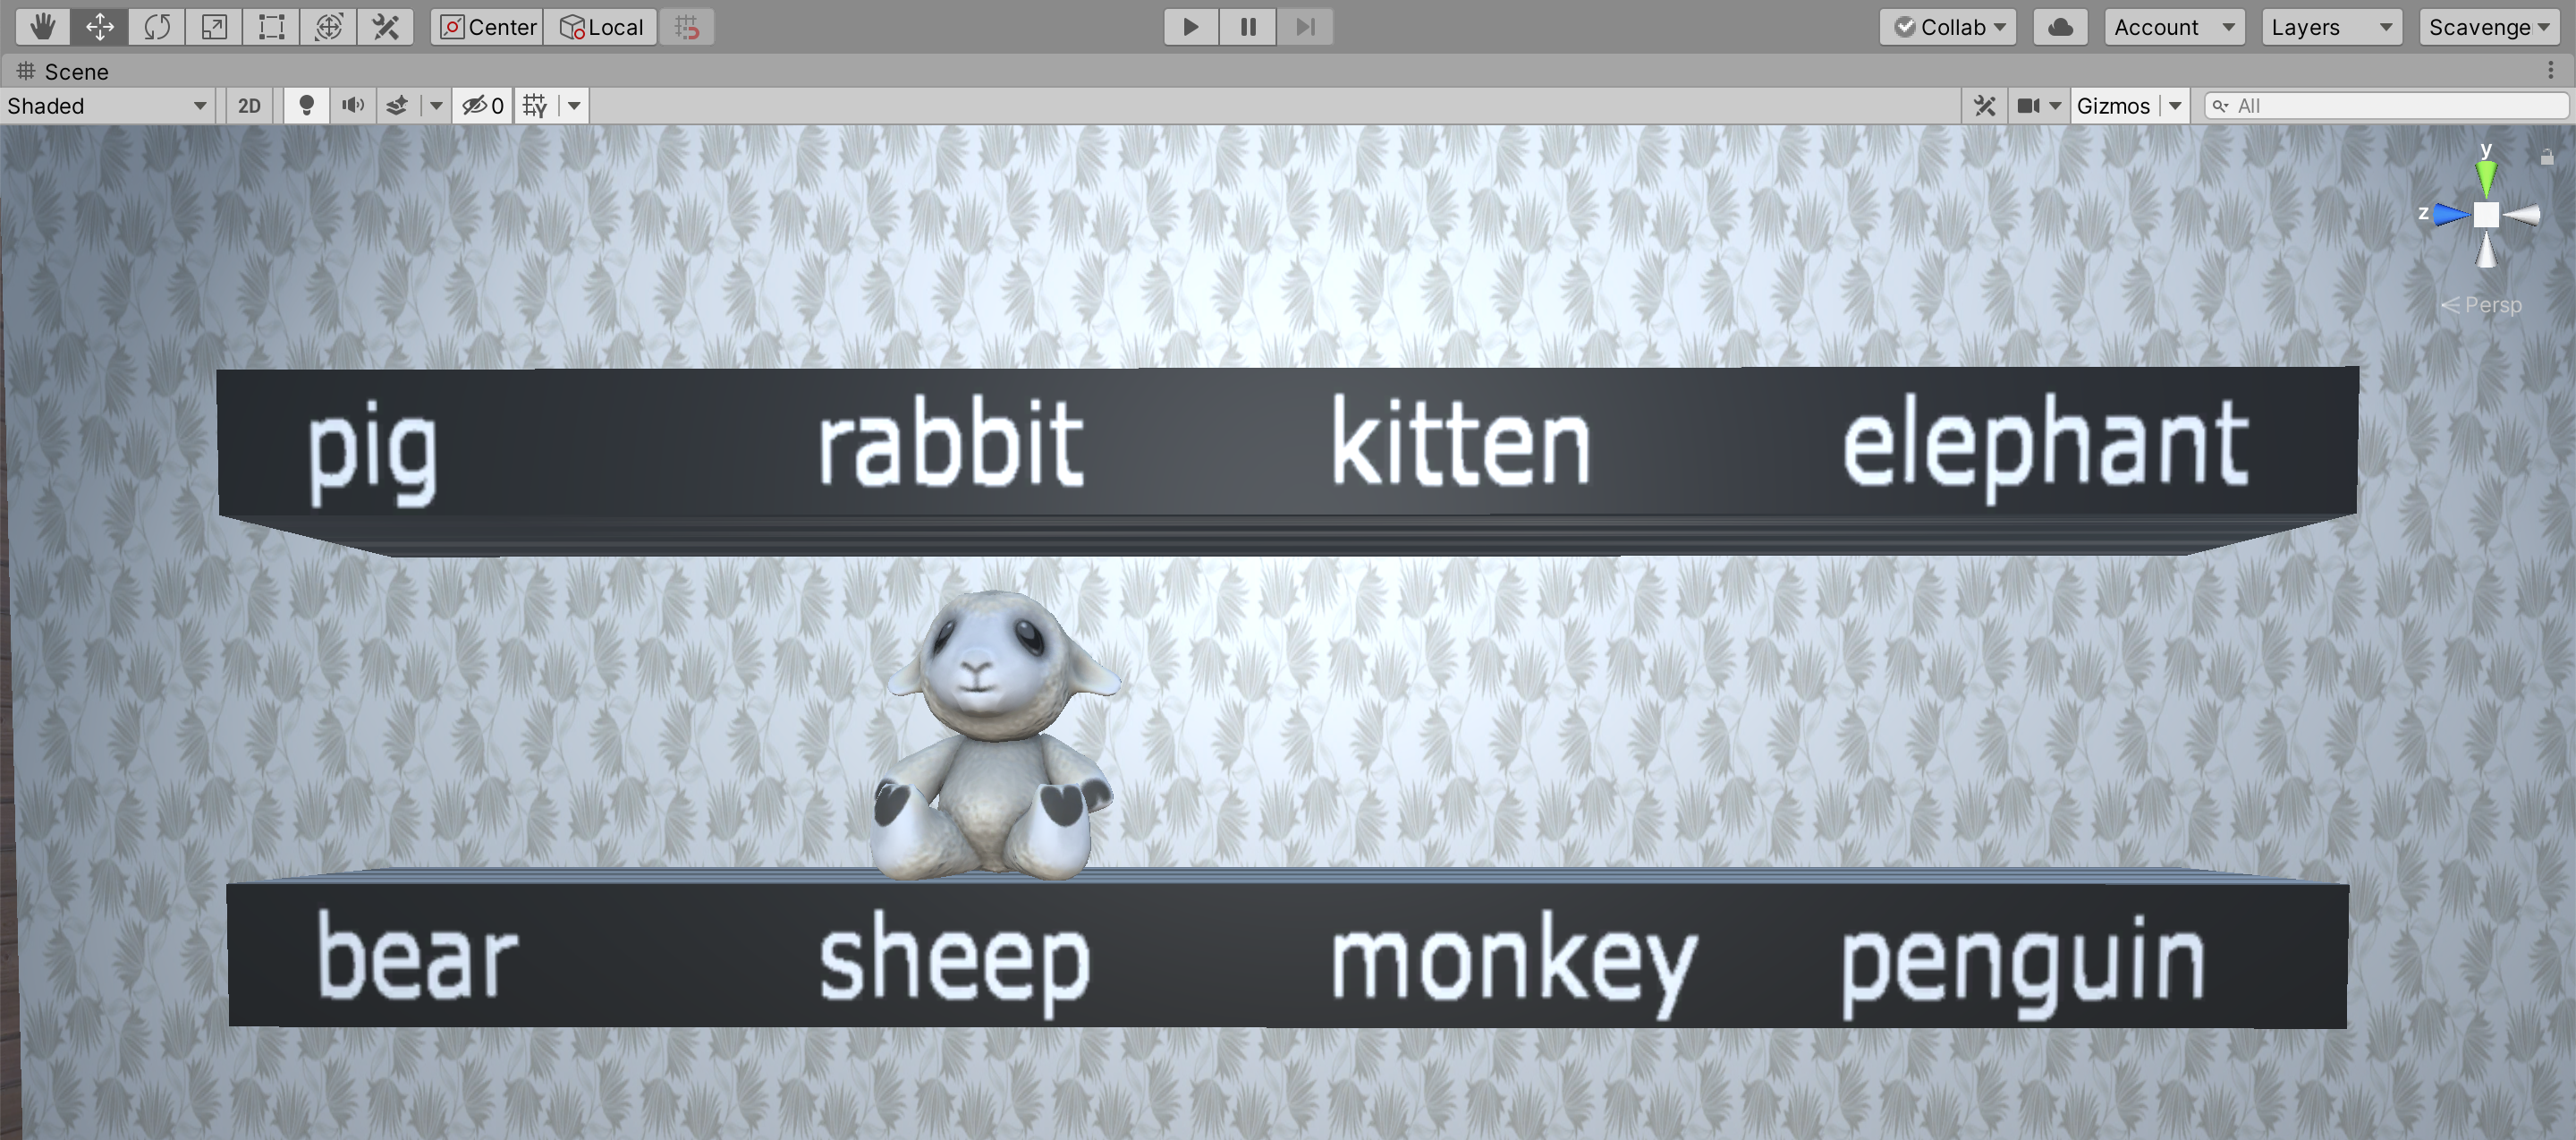
Shelves with labels for missing stuffed animals should be visible within the scene view. If not, navigate through the scene using the movement tools you have until you are in the upstairs bedroom with the shelves. The sheep is already in its proper place! -
Make only the Scene Window visible.
One way to only show the Scene Window is to right-click on each open tab other than the Scene and select Close Tab.
A faster way to view only the Scene Window is to press Shift Space while the Scene Window has focus. Using Shift Space allows you to quickly toggle between one full-screen window and the current layout. -
Use the following hints to find each of the missing animals.
Once you find them, use the move, scale, and rotate tools on each animal to place them in the designated space on the shelf.
pig Enjoying the beautiful day rabbit Dirt don't hurt kitten Ready for a nap elephant In the clouds bear In the forest monkey Bumped my head just like mamma said penguin A reprieve from global warming
Wrap-up Activity
Animal House Scavenger Hunt
When you have finished the Complete the Hunt activity, take a screenshot of the shelves with all animals in their proper place similar to the screenshot in step 9 of the above lesson.On a PC, you may use the Snipping Tool to create a screenshot. If needed, use this guide from Microsoft: Use Snipping Tool to capture screenshots.
On a MAC, you may use Command + Shift + 4 to create a screenshot. If needed, use this guide from Apple: Take a screenshot on your MAC.
How did you do? Take a moment to reflect by completing the Evaluation Rubric for the Animal House Scavenger Hunt.
You may Create a Copy of the Evaluation Rubric for your own use.