Platformer Mod
In this tutorial, you will build out a level of a platformer game.
Setup the Project
Open up your Bouncy Box project in Unity.
Download the Platformer project to your Desktop if you do not already have it. Extract the files from the zip file. Then locate and open the Scene01.unity file to open the project in Unity.
When you play the game, you should have a player that you can control using W A S D to move and Spacebar to jump.
The green bar at the top left represents the player's health.
Explore the Project
Become familiar with the content that has already been added to the project.
In the Project Window, you should see the following:
-
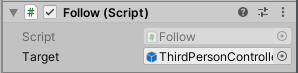
Main Camera - Inspect this to see that a Follow script has been attached to the camera. The script simply tells the camera to follow a specified target. In this case, the target has been set to the ThirdPersonController (the player).
-
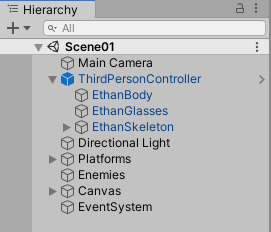
ThirdPersonController - This was an asset from Unity's Standard Assets, imported from the Asset Store. This includes the character model, named Ethan, which you can see when you expand the GameObject in the Hierarchy to see its children.
Inspect the ThirdPersonController to see that it has an Animator, a Rigidbody, a Capsule Collider, and four scripts attached.
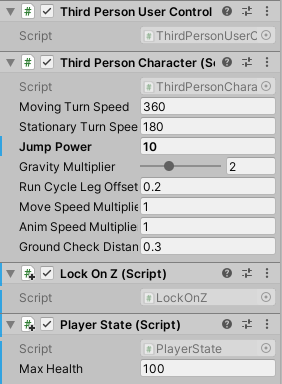
The ThirdPersonUserControl and ThirdPersonCharacter scripts were imported along with the Standard Assets. You should adjust the properties (such as Jump Power) and test them before you begin building out platforms in your game.
The other two scripts were custom made for this game.
The LockOnZ script simply keeps the player locked on the Z axis so that he may not fall off the front or back of a platform.
The PlayerState script was set up to track the player's state. For the moment, that is simply tracking the player's current health, which starts out at full health. You can change the value of Max Health if you wish. - Directional Light - lights up the scene
-
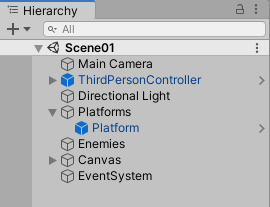
Platforms - Empty GameObject set up to hold all platforms in the scene. Expand the Platforms to see the one Platform already in the scene.
- Enemies - Empty GameObject set up to hold all enemies in the scene. Currently, there are no enemies in the scene.
-
Canvas - The Canvas holds the UI elements. Currently, the only UI elements are a Panel, which contains the Healthbar, which contains the Health.
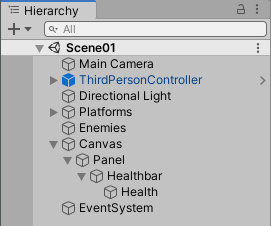
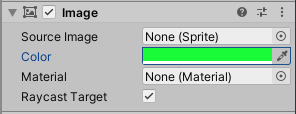
You can change the color of the Health (which is currently white) or the Healthbar (which is currently green) by changing the Color property of their Image component.
- EventSystem - Is automatically included when a Canvas is created to handle events related to UI elements such as buttons and checkboxes, of which there are currently none.
-
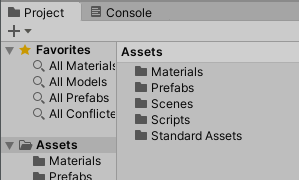
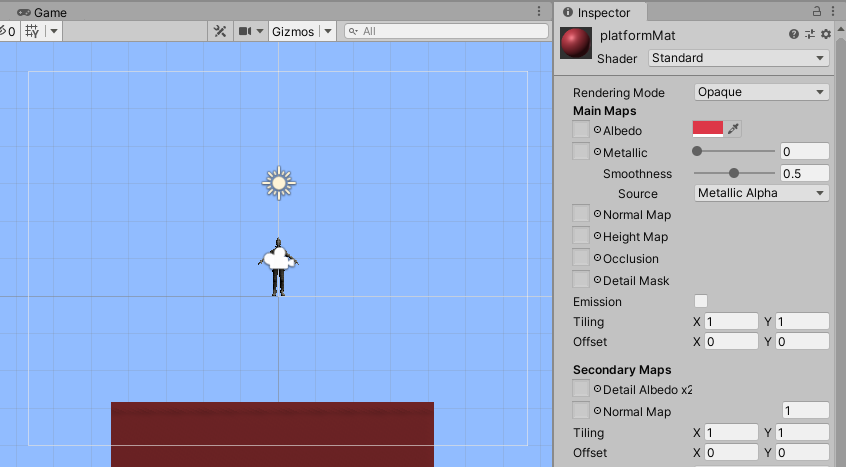
Materials - Includes the materials created for the project thus far. Within the Materials folder, select the platformMat to view its properties in the Inspector Window. Set the color you want to use for your platforms by changing the Albedo property.
- Prefabs - You will see a few Prefabs that you will be using to build out your level. Currently, the only Prefab that has been added to the scene is a Platform.
- Scenes - Contains the current scene. You may decide to add additional scenes in the future to create more levels of the game.
- Scripts - Includes all custom scripts created thus far. The Follow script attached to the Main Camera and the LockOnZ and PlayerState scripts attached to the ThirdPersonController were discussed already. The remaining EnemyBehavior and MovingPlatformBehavior scripts are attached to prefabs that you will soon be adding to your game.
- Standard Assets - Contains the ThirdPersonCharacter of Unity's Standard Assets which were downloaded from the Asset Store.
Add Platforms
Begin building a level by adding some platforms.
You may want to zoom out so that you can see much more of the scene before you begin.
To add a platform, drag the Platform prefab from the Prefabs folder into the scene.
Move and scale the platform to your desired position and size.
To keep your Hierarchy Window organized, move the Platform you created to be a child of the Platforms GameObject.
Test out the game to ensure the player is able to jump from one platform onto your new platform. Make any adjustments necessary, you may need to put the platforms closer together for the player to be able to jump from one to the other.
You might find it faster to add platforms by duplicating existing platforms.
Select the Platform you created and press Ctrl D to duplicate it. You could also right-click on it in the Hierarchy to duplicate it.
Notice in the hierarchy that a number is appended to the name and it is already a child of the Platforms object.
Move and scale it as desired.
Add a few more platforms to get the hang of it. Remember, this is the beginning of the first level, so it should be fairly easy for the player to move through as they get comfortable with the player controls. You can ramp up the difficult as the player gets further into the game.
Once you feel the player is ready for a bit more of a challenge, add some moving platforms.
Move Platforms
Continue building your level by adding some moving platforms.
To add a moving platform, drag the MovingPlatform prefab from the Prefabs folder into the scene.
Move and scale the platform to your desired size and place it at its initial position.
To keep your Hierarchy Window organized, move the MovingPlatform you created to be a child of the Platforms GameObject.
With the MovingPlatform selected, locate the attached MovingPlatformBehavior in the Inspector. Leave the Horizontal property checked on so that the platform moves side-to-side. Change the parameters as desired.
The MinFromStart and MaxFromStart define how far to the left and right the platform will move from its original position. The MinFromStart should be a negative value or zero. The MaxFromStart should be a positive value or zero. If both of these are set to zero, it will be stationary.
The speed may also be adjusted. However, remember that the first time a moving platform is introduced you may not want it to be too challenging for the player. so you might make it only travel a short distance at a slow speed. You can increase the challenge as the game progresses.
Finally, test out the game to ensure the platform moves as intended and the player is able to jump onto and ride the platform. Make any adjustments necessary.
Continue adding adding stationary and moving platforms to build out an entire level. Remember you can speed up your process by duplicating other Platforms and MovingPlatforms with Ctrl D.
Do not overuse the moving platforms or make the level too difficult because you will be adding enemies next.
Add Enemies
Add some hazards and enemies to your game.
Currently, the only hazard in the game might be falling off of platforms.
Let's add another hazard. Drag the Enemy prefab into the scene and place it near, but not on, the player's starting position. This will allow us to test it out quickly without having to play through the level.
I call this enemy a hazard because, unlike most enemies, it has not AI. It does not chase after the player or even move. It is simply something for the player to avoid.
To keep the Hierarchy organized, drag the Enemy to be a child of Enemies.
With the Enemy selected, locate the attached EnemyBehavior in the Inspector. Check on the Continuous Damage property so that the player will continue being damaged for as long as they are in contact with the Enemy.
The Damage property defines how much damage the Enemy will cause per second. This dps (damage per second) is in play only when Continuous Damage is selected.
Consider the player's maximum health when deciding on the value for Damage. If the MaxHealth of the PlayerState was left at its default value of 100, then setting the Damage to 1 would cause the player to lose 1% of their health every second. This might be good for the lower-level enemies you might expect in the first level of a game.
Play the game to see how quickly the player's health decreases when touching the hazard.
Make changes to the dps as needed. Once you are satisfied, move the enemy to anywhere in the scene you would like it to be placed.
Add more hazards by duplicating the hazard you already created so that each new Enemy will already have the appropriate Damage value.
What's Next?
Consider a Platformer for your final project.
If your team decides to create a Platformer for your final project, lessons will be provided that will help:
the game programmers:
• Restart the level when the player falls or dies
• Add more complex enemies
• Spawn enemies on a timer
• Add a countdown timer
• Add a win condition
• Use player lives instead of health
the artists:
• Change the background color
• Add seamless textures to platforms
• Swap out the player character
• Use 3D models for hazards and enemies
• Create start and game over screens