Updating the UI
Sometimes we will want our UI to change to give the player new information.
In this lesson we will create a simple counter which will increase when we collect items e.g. coins.
A Counter for Coins
- Dowload the Coin Counter Roblox project.
Right click on the downloaded file then click Open to open the project in Roblox Studio.
Play the game and you will see golden spheres that represent coins. Later you will be able to use custom 3D objects, but for now we will use basic shapes for our items.
Walk into the coins and watch what happens to the text label in the top left. - We are going to add a counter for collecting another item. The first step is to create the item you want to collect.
Creating an Apple
- On the Home tab, click the arrow on the Part button and select the Sphere.
-
- Rename the part to Apple.
- Change the BrickColor in the part properties to an apple color, e.g. red.
- Resize it to make it smaller and move it to a location that the player can collect it.
The Apples Group
We need to create a Group for the items we want to collect.
- In the Explorer, right click on the Apple and click on Group.
- This will create a group (also called a Model) with the Apple part inside.
Rename the group to Apples.
Creating the Label
Like the coin counter, we need to create a text label for the apples counter.
- In the Explorer, open the StarterGUI by clicking on the arrow next to the name.
Then open the ScreenGUI to find the CoinCounterLabel. - Right click on the CoinCounterLabel and click on Duplicate.
This will create a copy of the CoinCounterLabel.
Editing the Label
We want to move and edit the new text label to be different from the coin counter.
- Rename the copy to AppleCounterLabel so the name is different.
The apple counter label is currently positioned over the coin counter label, so move it underneath instead. - In the Properties, change the text to Apples: 0. This will be the starting text for the label.
Change other properties to make the label look different. E.g Color.
Updating the Label
Now we need to update the label when we pick up an apple.
- When we duplicated the label, we also copied the script inside of it.
Open the AppleCounterLabel and you will see the CoinCounterScript.
Rename the script to AppleCounterScript since it will be counting apples, not coins. - Double click on the AppleCounterScript and you will see this code.
  local items = workspace.Coins

  local localPlayer = game.Players.LocalPlayer\r\n
  local itemCount = 0

  for _,item in pairs(items:GetChildren()) do
    if item:IsA("BasePart") then
      item.Touched:connect(function(hit)
        if hit.Parent:FindFirstChild("Humanoid") then
          local player = game.Players:GetPlayerFromCharacter(hit.Parent)
          if player then
            if player == localPlayer then
              itemCount = itemCount + 1;
              item:Destroy();

              script.Parent.Text = "Coins: " .. itemCount;

            end
          end
        end
      end)
    end
  end
- Change the name workspace.Coins to workspace.Apples to match the name of the item you want to collect.
The name must be written exactly as the group was named. - On line 16, change the name
Coins:
in the quotes to match the name of the group of things you want to collect.
In our case it will beApples:
.
local items = workspace.Apples
script.Parent.Text = "Apples: " .. itemCount;
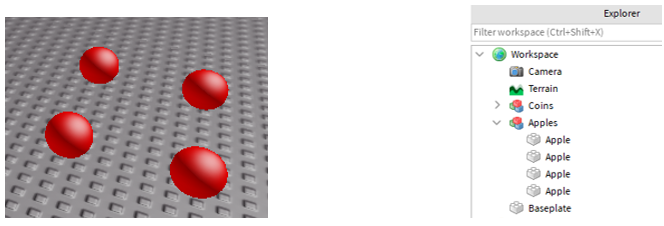
Adding More Apples
Now we just need to add more apples to collect.
- In the Explorer, open the Apples group and click on the Apple.
Duplicate the Apple by right clicking on it and selecting Duplicate.
The new apple appears in the game overlapping the first apple, so move it to a better position. - Repeat this to create as many apples as you want.
Testing the Game
Now everything is done, we can test the game again.
- Play the game and walk into the apples you created.
The Apples counter should update. - You can now create labels for any group of objects you want to collect.